
Some users figure things out themselves, others prefer to read, a few ask, and some want a video. Ultimately the goal is the same: get the users’ problems solved so you can reduce your support load. Providing both a user manual and tutorial videos can go a long way towards achieving this.
Creating a tutorial video itself isn’t an overly difficult task, though it can be somewhat time-consuming, especially when going beyond just a screen recording. It’s worth it, though. Putting this time into a few small things that boost the overall production value will transform a simple screen recording into a more helpful tutorial for your users.
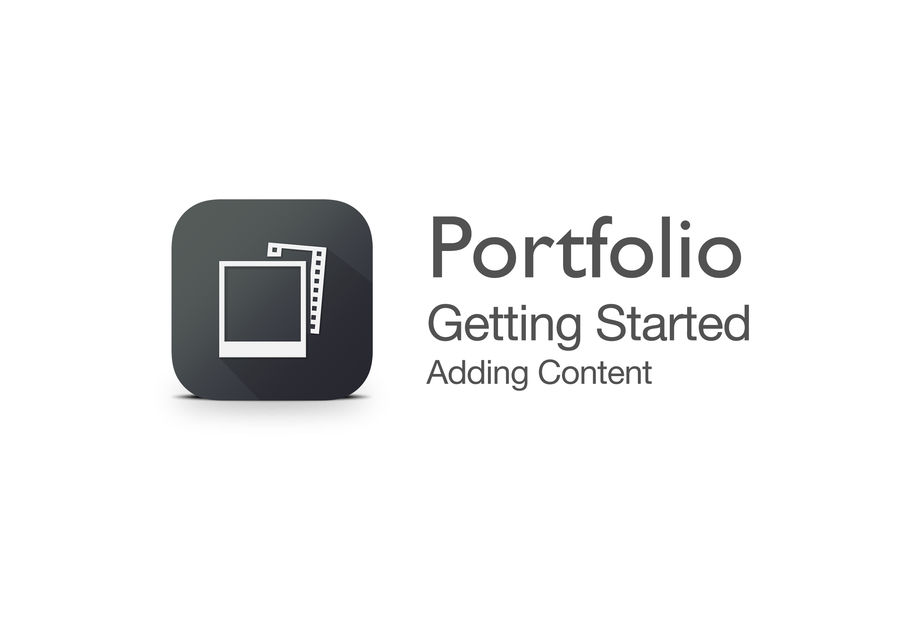
For this post I’m going to walk through the basic steps I took to create Portfolio’s “Getting Started – Adding Content” video. This won’t be a tutorial on how to use any of the tools, more a guide on how I used them to get this result and downloads of the parts that are reusable.
Tools Used
- OS X Yosemite
- QuickTime Player
- Apple Motion 5
- Apple Compressor 4.2
Create a Script
What do you want the video to show? Planning this out ahead of time allows you to get the necessary demo content loaded in the app and figure out which clips you’re going to need to capture. In my experience it’s a lot easier to capture multiple, smaller clips than it is to try to annotate one large screen recording.
For the Getting Started video I wanted to show every step from the first launch of the app to loading some content and viewing it. This meant I needed to capture several clips to cover it all:
- Entering the content loading area.
- Adding the first gallery.
- Selecting the content to load.
- Exiting out of the management area.
- Browsing the content.
Capturing the Clips
QuickTime Player on OS X Yosemite gained the ability to record an iOS device’s screen when plugged in. I had previously used ScreenFlow to do it but found I liked the workflow in QT Player better.
Recording a clip with QT Player is pretty straightforward:
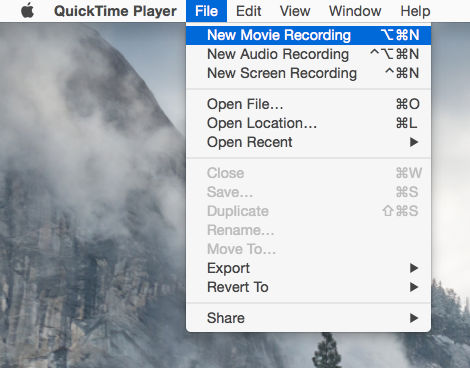
Set the source as the iOS device and you’re ready to go:
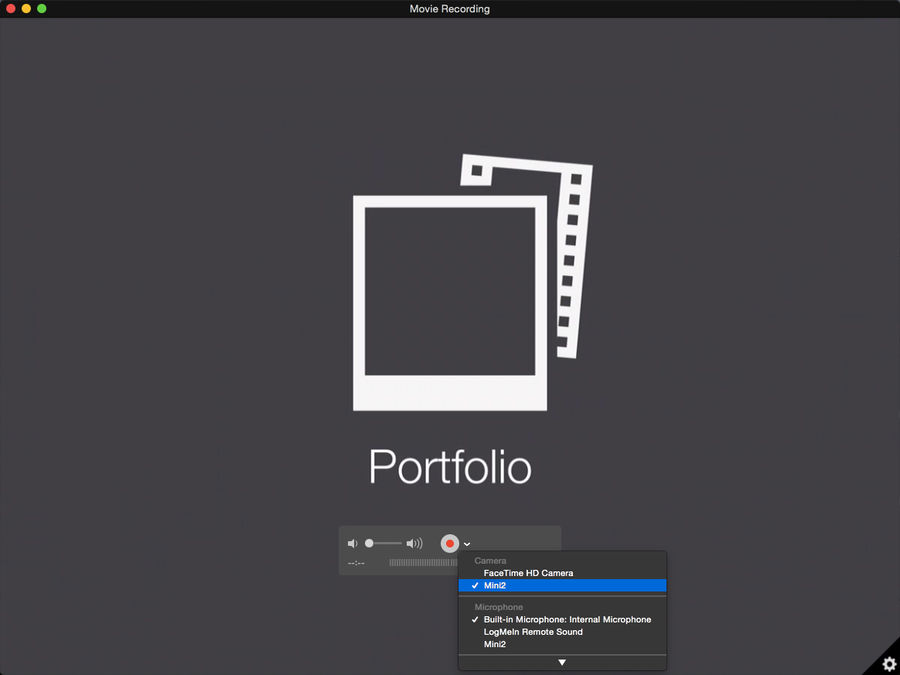
As you record and save each clip, be sure to name them something you’ll actually understand later.
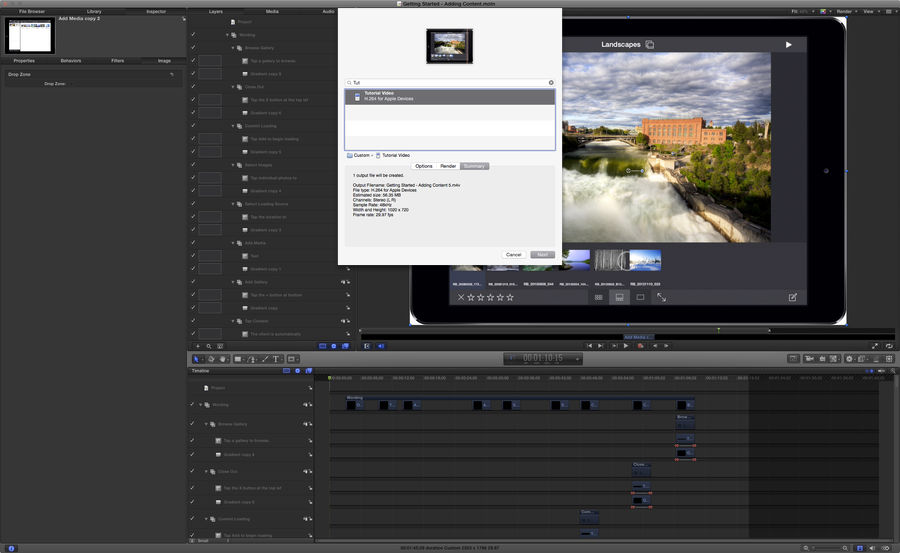
Building the Timeline
Most of the work putting the video together will be done in Motion. If you’re unfamiliar with it, it is to video creation and manipulation as Photoshop is to still images. Like Photoshop, it has a lot more depth to it than you’ll likely ever need, but getting familiar enough with it to put together a tutorial video should be doable.
Preparing the Files
Prior to doing anything else I work on creating most of the intermediate files I’ll need. This includes the splash screen and wrapping the clips in an iPad bezel (this is a personal preference – it would still work without it).
Download an Apple Motion project for easily wrapping clips in an iPad frame.
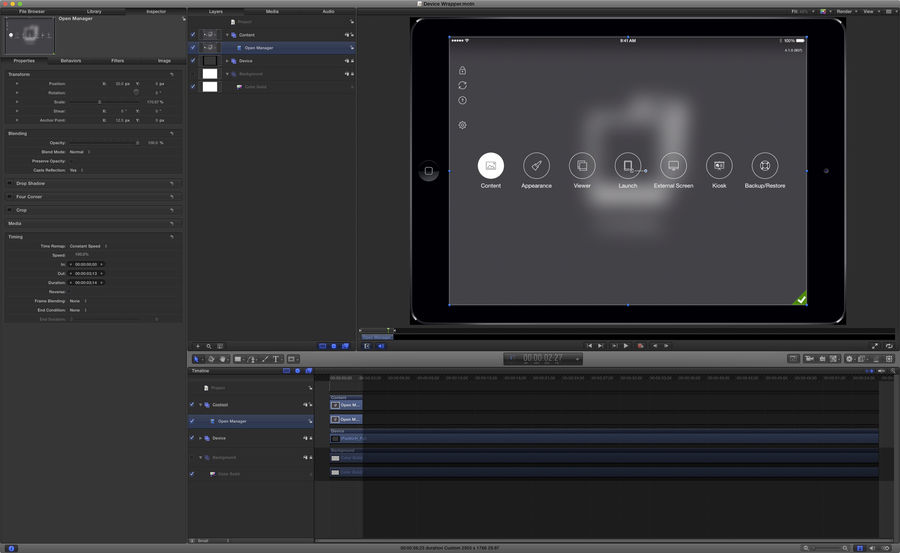
Starting the Project
For the project file I use the same settings as the device wrapper project above: 2503×1766 at 29.97 fps (I create the project at full Retina resolution in case I ever need it larger – its actual export size is smaller). After creating this it’s just a matter of dragging components into the timeline and putting it all together.

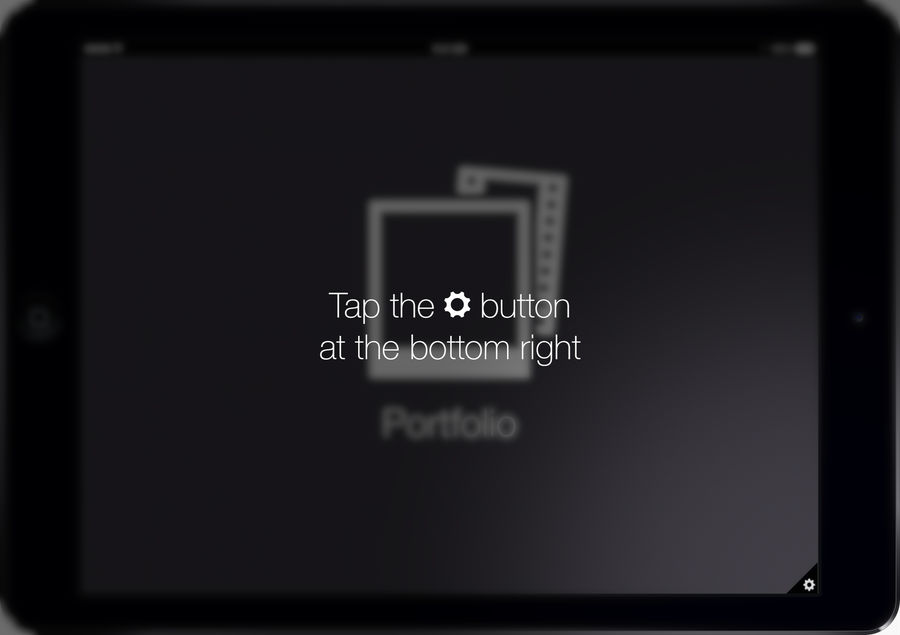
After adding the splash screen I then begin adding the clips I created earlier, building informational callouts as needed to direct the user. There’s not much to it other than a lot of copy/pasting of the same effects. Since building them initially I have been able to reuse them across multiple projects.
Before continuing on I do want to bring up one very useful function hidden in the Share menu: Save Current Frame. This allows you to export any frame at full resolution for use while showing a callout. It eliminates the need to mess with the clip’s timing, which is very problematic when trying to tweak things later.
Callouts
The most important part in creating a tutorial video is both showing and telling the user the steps to do. Since this usually means tapping a specific button or interacting with only a small part of the screen, it’s very helpful to focus visually on the relevant area for the step.
I like to do three things for each step:
- Display the tap. This animation is based on one I saw in Apple’s own help videos playing behind the Genius Bar at the Apple Store.
-
Show a vignette around the focus area to reduce the distraction created by the rest of the interface. I prefer to combine both a gaussian blur and a dimming.
-
Display text saying what to do.
Download a sample project with these callouts.
Many tutorial videos also have a voice track to them. I choose not to do this as I have neither the equipment nor voice to do it well, but if you do, it should be as simple as recording each clip and positioning at the appropriate point in the timeline. I do add a background audio track so it’s not total silence, though.
Timing
As I’ve done more and more of these videos, I have found it very helpful to keep playing it through as I’m setting durations. It’s far too easy to make a callout too short so the user is unable to understand it without pausing or rewinding.
Exporting
Exporting the video is where Compressor comes in. Motion can do the export itself, but it will be a far larger video file as it doesn’t have the same level of encoding capabilities.
Download my preferred settings here.