
In the summer of 2017 we purchased a travel trailer, part of the motivation being that we could travel more (really, to avoid the summer forest fires if for no other reason) while simultaneously working. Since I work remotely, I am able to work anywhere I have sufficient hardware (usually my laptop and local test server) and an internet connection. After weeks and months of research and effectively being a daily stop for delivery drivers, I finalized the installation of the last bit of equipment to maximize my travel range and trip duration. This is my attempt to write it up in enough detail that I can maybe save some time for others.
The Options
There are three connection types available as options: Wi-Fi, cellular, and satellite. While they can share a common set of central hardware, each requires its own unique set of connection equipment to bring the source into the trailer’s network. Each also has its own setup and tear-down procedures for each camp spot, but with practice, that quickly becomes something you can do in a few minutes.
Wi-Fi
When usable (experience has shown it rarely is), campground Wi-Fi usually avoids the whole data overage problem. Instead, it replaces it with a signal strength problem. Campgrounds can be rather large and are often full of trees and other obstructions — high frequency radio waves degrade quickly with both of these — so an antenna larger than the typical laptop possesses can be necessary.
The best option for a potentially distant access point is a bridge with an amplifying directional antenna like the Ubiquiti NanoStation M2. Normally I avoid the 2.4 GHz spectrum because of the overcrowding, but because it is the original frequency range, it’s going to be the most commonly available. I have not yet encountered any public network where only 5 GHz was present.
In actual use, though, campground Wi-Fi is only usable some small fraction of the time. The speed is often in the ballpark of 1 Mbps or less, and the crowding with other users can lead to significant and unpredictable latency and connection drops. It’s not a connection method I’m going to spend any additional money trying to improve.
Cellular
The cellular options are difficult to write about. It’s not that they’re incredibly complex or difficult to understand; rather, it’s that the available hardware and plans change faster than you can research something and write about it. As of my original draft of this post, the leader in the RV mobile internet space was the ZTE Mobley on AT&T (unlimited data but throttled at 22 GB for $20/month), and that’s what I went with as my primary option. It’s intended as a device and service to provide in-car Wi-Fi via power from the OBD-II port, but both 5V USB and 120V AC adapters power options are available.
It’s in the hardware where the biggest limitation is: the antenna is weak, and there’s no port of any kind to attach a better one to. Instead, it’s a problem that needs to be solved with some additional hardware: a weBoost 4G-X RV and an optional yagi antenna. This device can’t create a connection where there is none, but what it can do is take a mediocre connection and make it more usable. In practice, I have seen the signal increase by 30+ dBm (enough to go from two bars to four).
Now, it would be nice if the entire problem could be solved with a single carrier, but in my experience, particularly in rural areas with already-weak signal, there is usually only one carrier strong enough to use. This means needing some redundancy, which really means Verizon. Only Verizon and AT&T have had any service in the areas I want to go — all of the others only seem to have coverage in towns with adequate populations, never 100 miles from one. Right now I’m just using a phone’s hotspot when needed but plan on putting a more dedicated device into service at some point.
Beyond just the simple lack of signal, cellular connections introduce one additional complication: where urban cell towers typically use a fiber uplink, remote cell towers often use microwave backhaul links to integrate into the overall network. These operate in the 10-30 GHz range, which are frequencies that are highly susceptible to attenuation due to obstructions, rain being the most common one. Heavy enough rain can effectively bring down an entire cell tower connected in this way, and when that happens, it doesn’t matter how strong of a signal there is on the device.
Some cellular devices are built to output an Ethernet connection. For those that aren’t, such as the ZTE Mobley I carry, I have a small TP-Link router that is configured to connect wirelessly as a bridge and share that connection via its Ethernet port.
Satellite
Satellite is easily the most expensive option, but it’s also the most widely available. I didn’t use to think it would be a viable option, but after some research and discovering the EchoStar XIX activation in early 2017, it suddenly was. Coverage went from being available only around major metropolitan areas at a fairly slow 3 Mbps to being available virtually anywhere in the US and the border region of Canada at a rated 25 Mbps.
It does have some negatives, though, and cost is the biggest one. The minimum level of equipment needed is north of $1500, and the smallest monthly cost (around $90 because you’re forced to use the business rates) makes even cellular service look reasonably priced. That said, it’s still within the realm of practical.
A second negative is the latency, which is unfortunately unavoidable as a byproduct of physics. Because of the distance involved, the minimum latency for a single connection is around 600 ms (dish > satellite > uplink > satellite > dish). In practice it tends to average 800 ms, but even at these high values, the connection is still usable for all but fast-paced multiplayer games. It does work for VOIP, which was one of my requirements.
Third, you need a perfect line of sight from the dish to the satellite. Even a couple of branches in the way will usually degrade the signal enough to where it’s unusable. This can mean positioning it some distance away or being unable to use it at all in areas.
Lastly, it has the most equipment and most involved setup of any of the options. The power draw for its equipment is around 100W and requires 120V (it has a dual-voltage power supply to feed the various components). Because of this, it can really drain your power reserves while boondocking if not actively running a generator or bringing in enough solar power.
Installation
My ultimate goal was to have everything internal permanently installed while keeping the external stuff as a temporary installation to be done at each new location. The cellular antenna and Wi-Fi bridge needed to be able to be above the roof line of the trailer while also having the option to relocate in case of overhead obstructions (e.g., large tree branches). Additionally, since both pieces are directional, they needed the ability to be rotated easily, preferably without needing to go on the roof. The satellite dish doesn’t mount to the trailer at all, connecting to it only via an RG-6 cable and sitting at ground level wherever there is a clear enough line of sight.
Bulkhead Ports
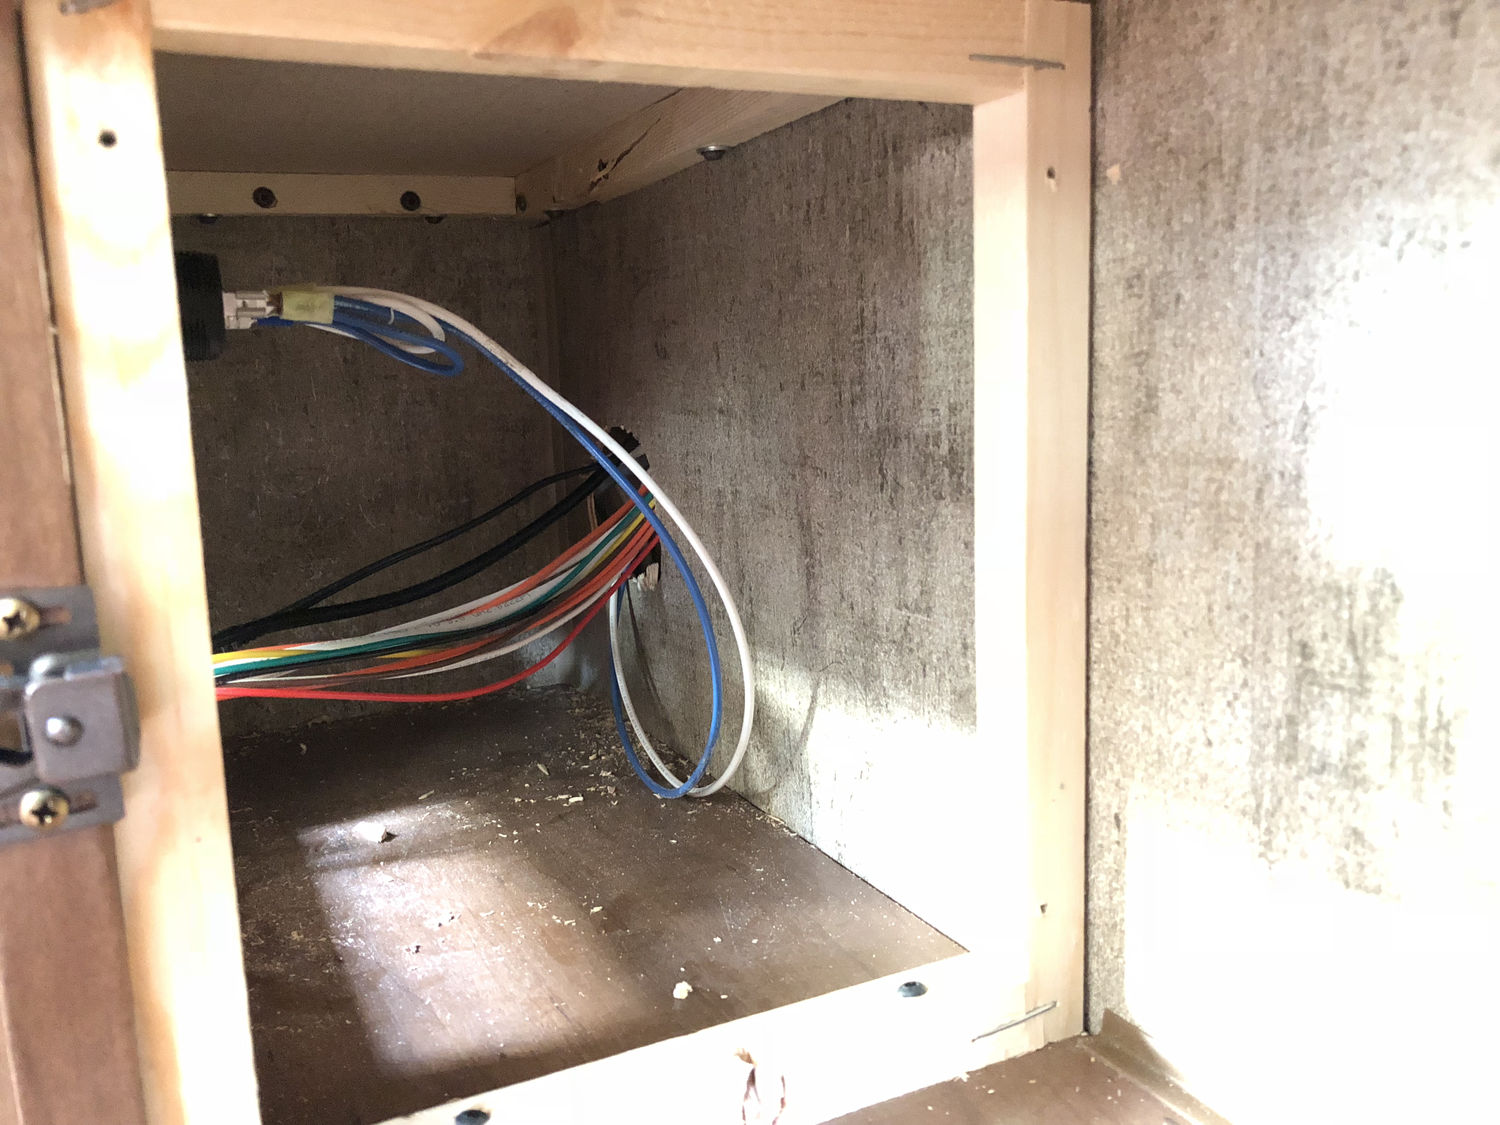
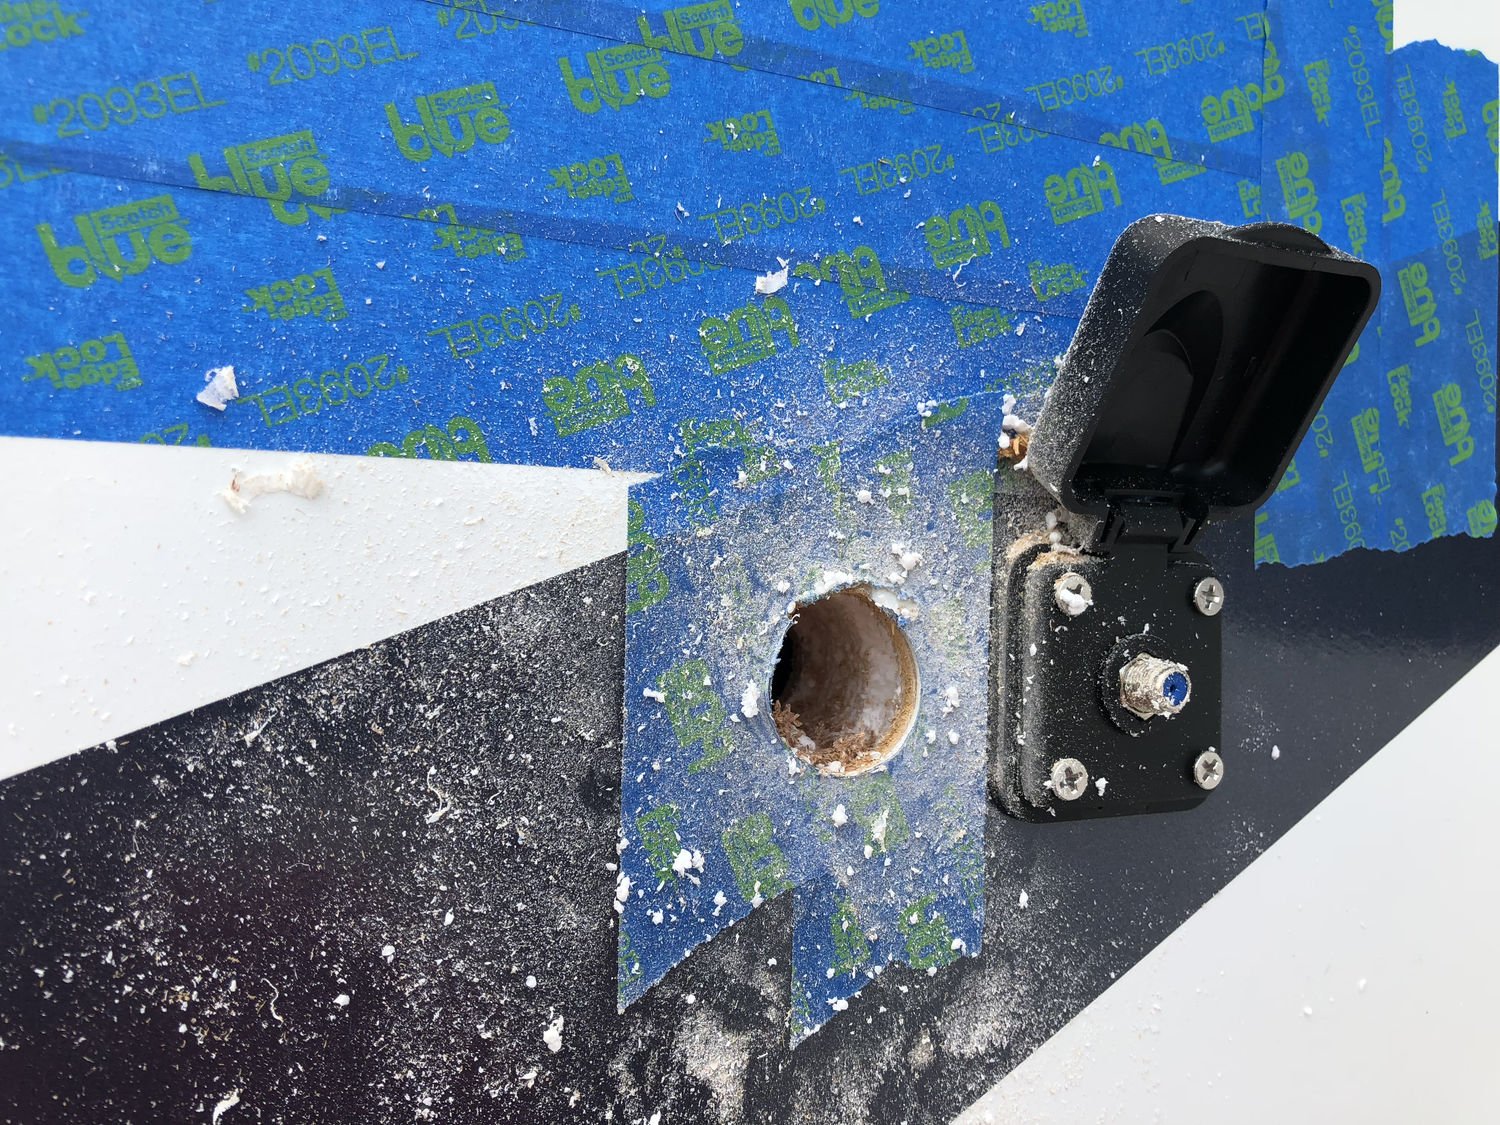
I started by removing the trailer’s stereo temporarily. Behind it is a very easy point to get through the outer wall for the ports, and I made three wall penetrations (drilling into the side of a brand new trailer is a bit unnerving): a SMA bulkhead for the cellular antenna, an F-connector bulkhead for the satellite, and an RJ-45 bulkhead for the Wi-Fi bridge. Of these three, only the RJ-45 bulkhead was an off-the-shelf part. The other two were created by replacing the F-connector in this port with an SMA connector and a 3 GHz F-connector.
Wi-Fi Bridge, Cellular Booster, and Satellite Modem
The yagi antenna’s port was connected directly to the weBoost unit inside via a 50 ohm RG-316 cable, which was mounted inside the cabinet. Inside that cabinet I also added a USB power source for both the Mobley and other future hotspots.
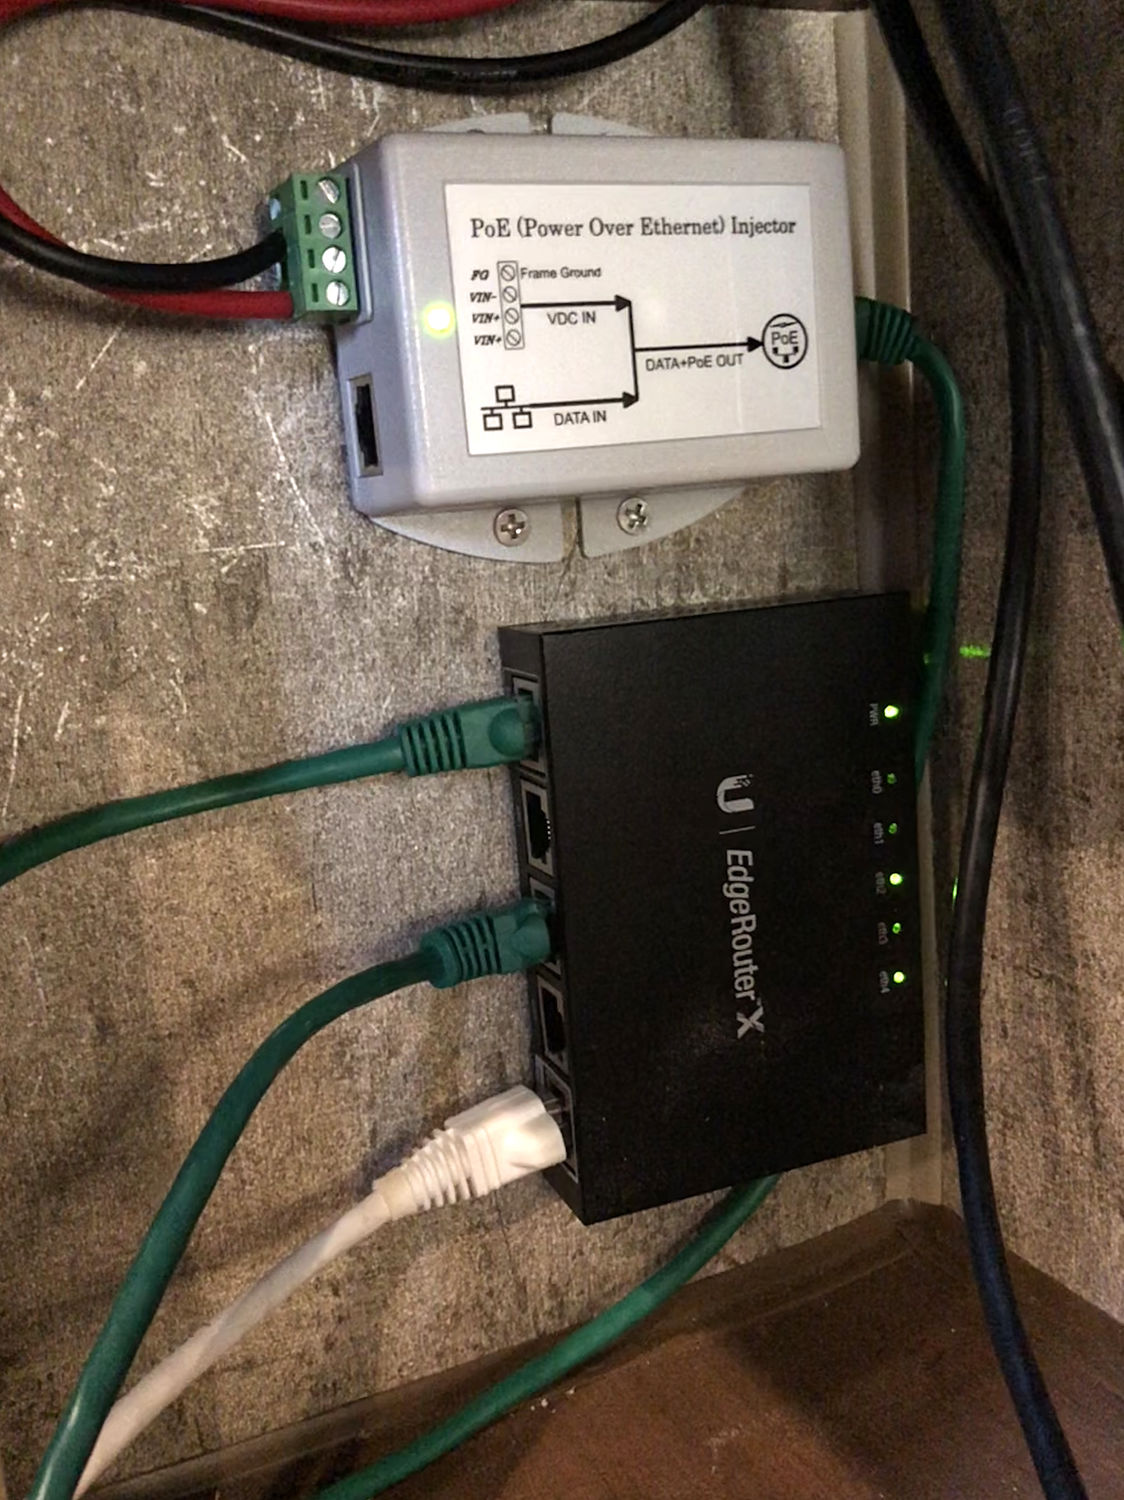
The NanoStation is powered via PoE, so its port is connected to a DC-DC PoE. That then is connected to the WAN port of the router when using that internet source.
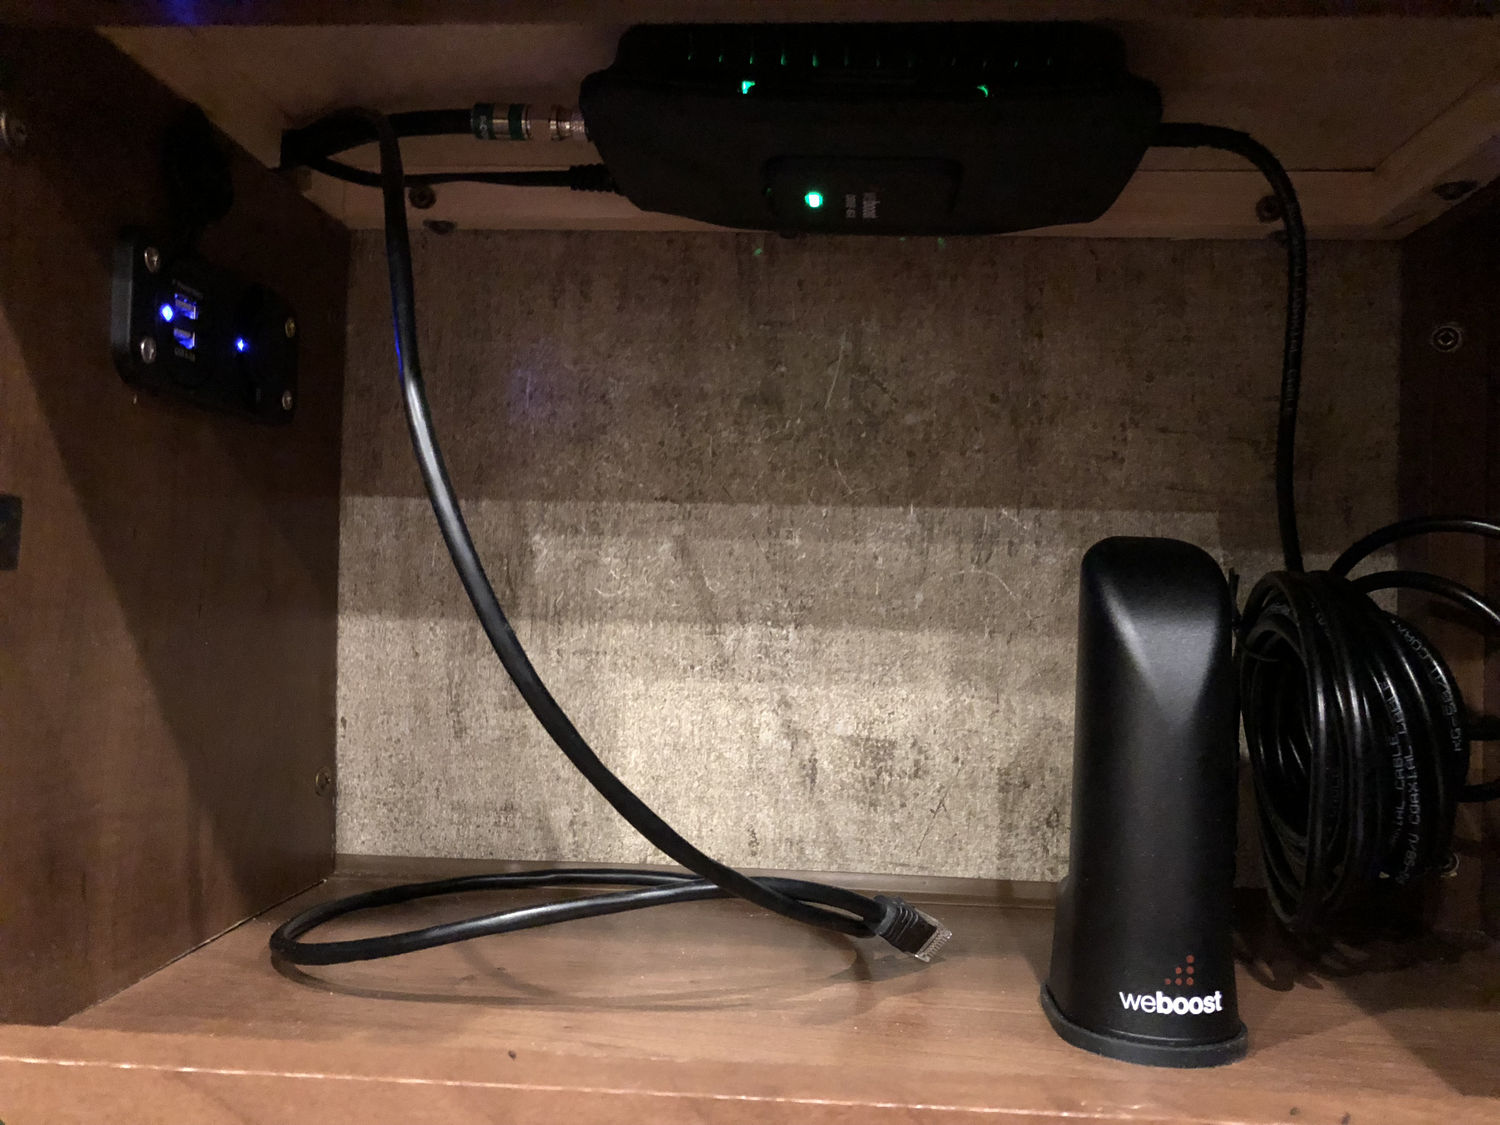
Lastly, the satellite’s port is connected directly to the HughesNet modem via an RG-6 cable.
Internal Network
The internal network starts at the router, for which I chose the Ubiquiti EdgeRouter X. Its selection was based on a few factors: low power draw, PoE passthrough, small size, and I like Ubiquiti’s equipment. The power draw is very low at a max of 5W, and the PoE passthrough enables me to use the same DC-DC PoE injector (separate from the one powering the external bridge) to power the internal access point.
One port on the router is configured as the WAN and is plugged in to whichever is the current connection method. The single PoE passthrough port goes to the access point, and the others are configured as a switch and used for any devices that require a hardwired connection, such as my development server and NAS.
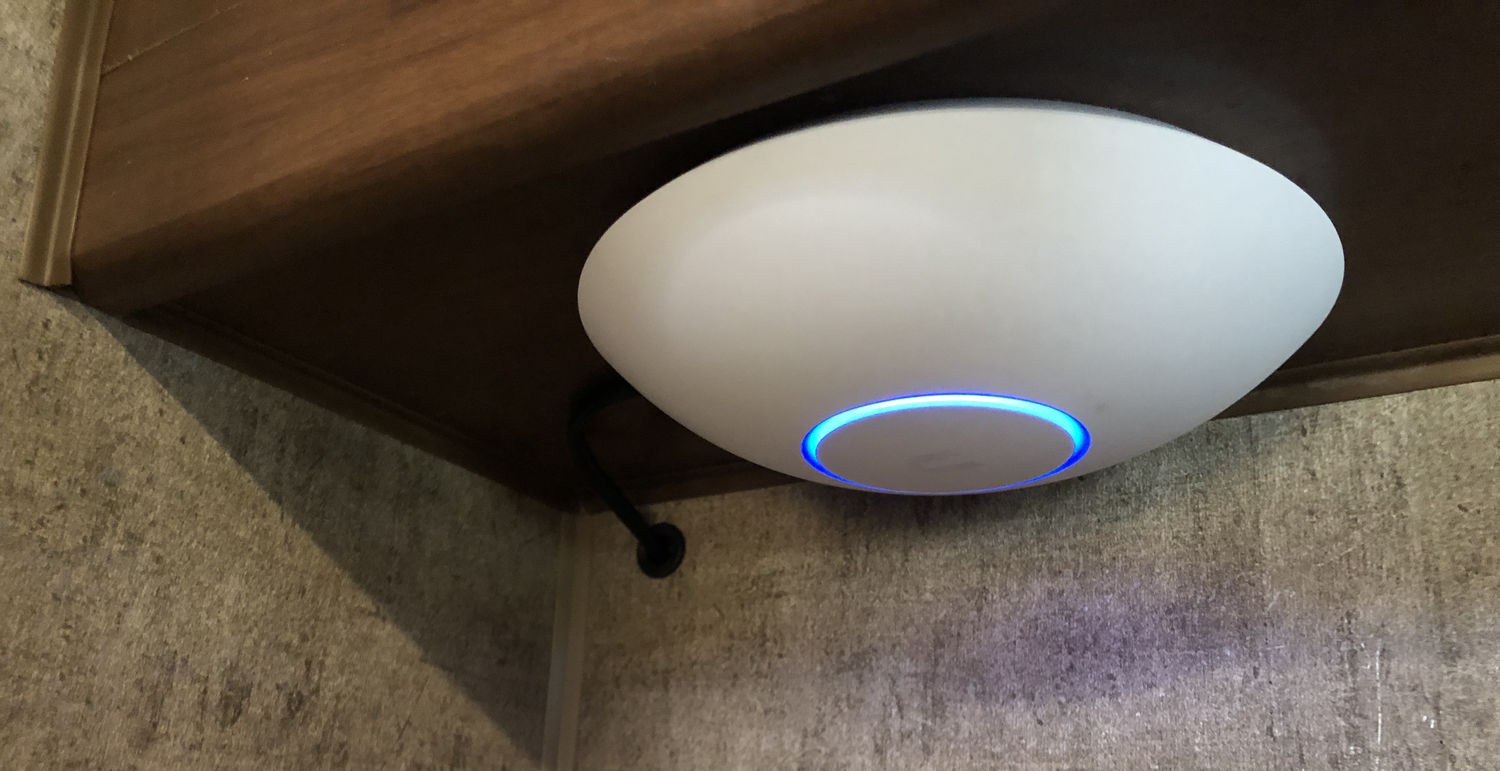
For the access point I chose the Ubiquiti UniFi AC AP LR. This is powered entirely by PoE, and to hide the wire, I ran it through the partition wall where the existing coax and other wiring was. It’s mounted to the underside of the overhead cabinet just above the TV.
Switches
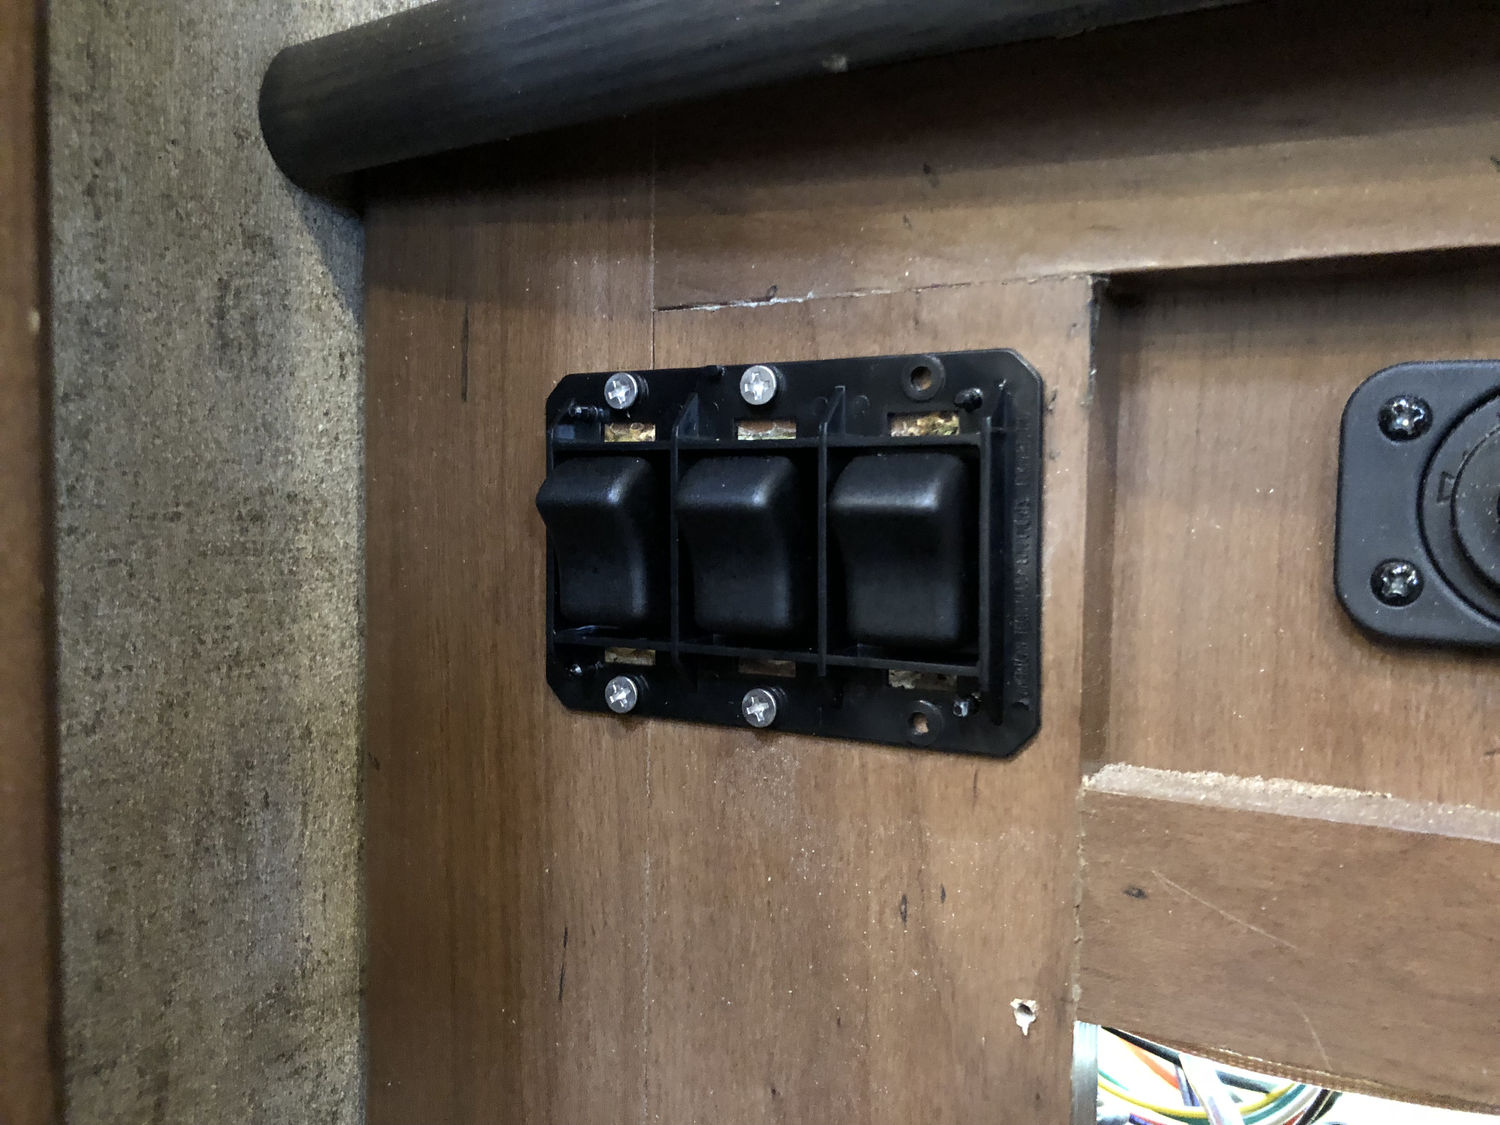
By hiding all of the wiring, I made it pretty much impossible to just “unplug” any of it. To resolve that, I installed a triple switch and wired it up to each of the three main 12V components: the external Wi-Fi bridge, the cellular booster, and the router and access point. With it I am able to just turn on the pieces I need and otherwise conserve power.
120V Power
Several of the devices I planned on needing don’t exist in 12V versions. Unfortunately, the only existing 120V outlet in this area is directly behind the TV, and using it would mean having a lot of wires hanging out. I wanted to put in another outlet, and I was able to find an exact duplicate of the RV Outlet (yes, the product in the photo is white — it came in black as I wanted). To install it I ran a small length of 14/2 wire inside the partition wall and spliced it into the existing outlet.
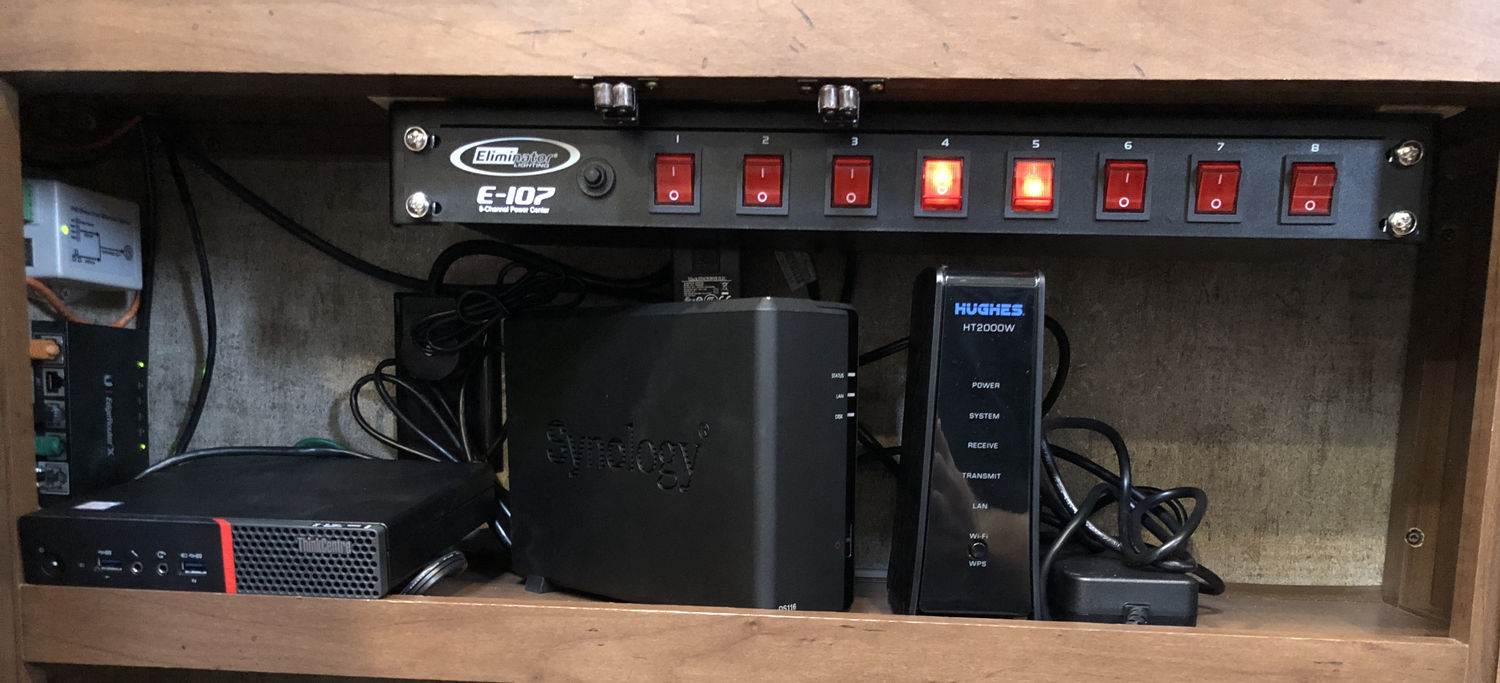
The partition wall is pretty thin in RVs and very flexible, so rather than fighting that when plugging and unplugging the various 120V devices to turn them on and off, I also installed a rack mount power strip with individual switches on each plug. A small 1U rack is mounted to the top of the lower cabinet via some short bolts, and the power strip itself is mounted to that. I cut off most of its own power cord and put on a right-angle plug to minimize the space it took.
Setup
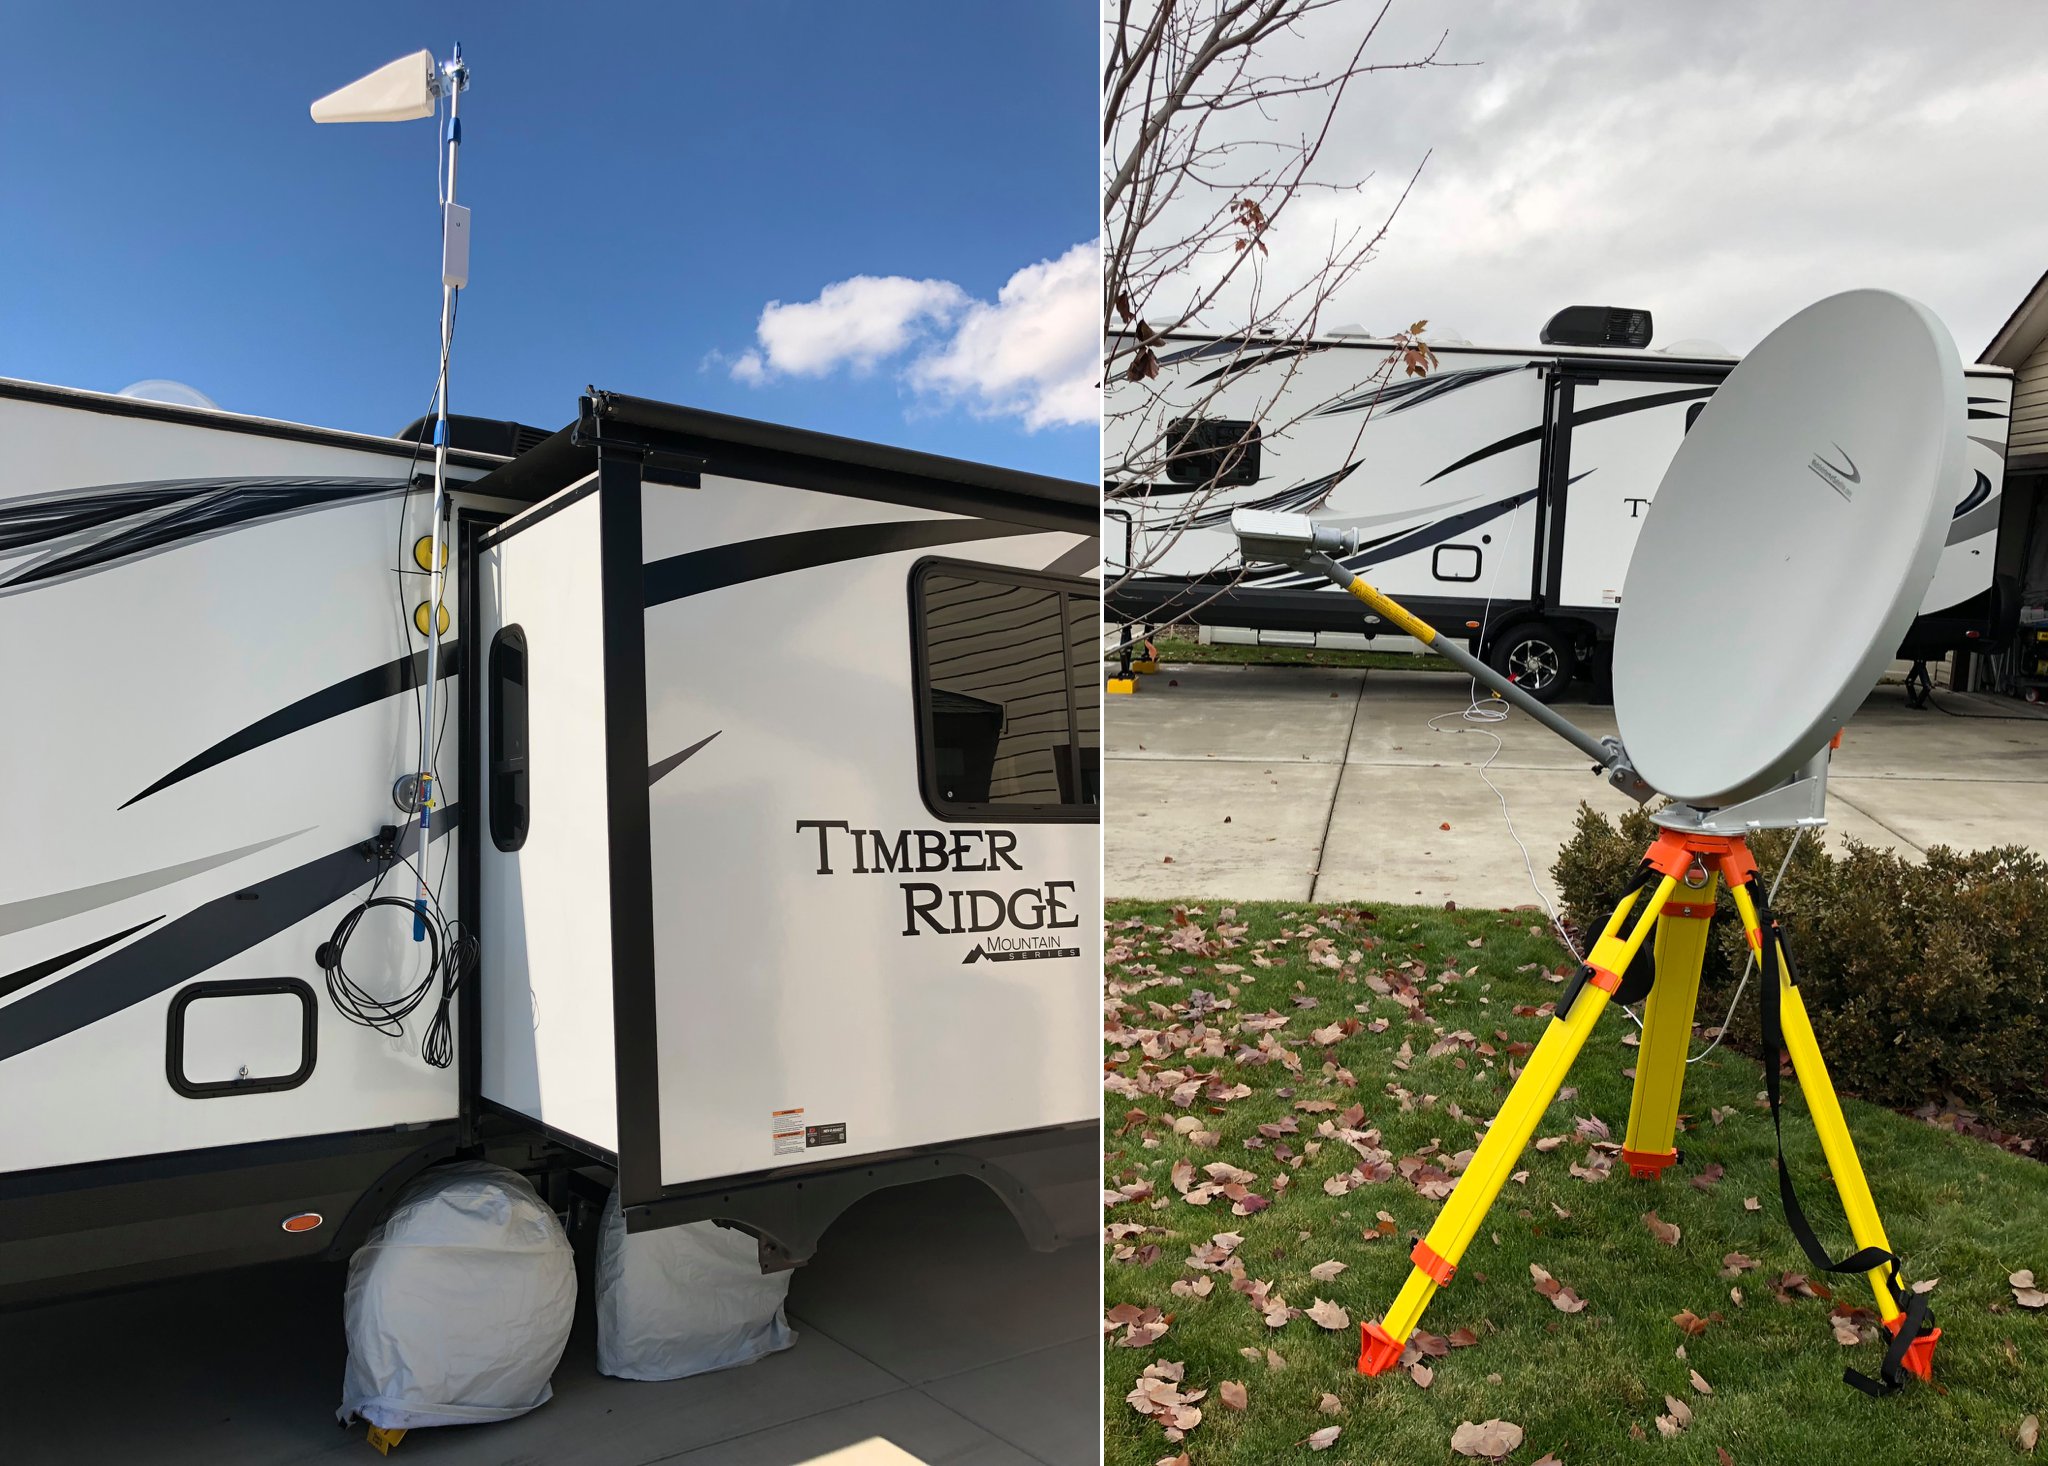
The setup and teardown is relatively painless. Both the Wi-Fi and Cellular connection methods use a telescopic pole attached to the side of the trailer temporarily with a single and double suction cup mount. The corresponding attachment is clamped to the top of the pole, and it is extended as high as needed to get a line of sight. The satellite dish gets connected and positioned according to the instructions that come with it.
The final steps are inside: if using campground Wi-Fi, the NanoStation gets configured to connect to their SSID and its RJ-45 plugged into the WAN port of the EdgeRouter. If using cellular, the cellular device gets placed by the inside weBoost antenna, the TP-Link connected to the corresponding SSID, and its RJ-45 plugged into the EdgeRouter. Lastly, if using satellite, its RJ-45 gets plugged into the EdgeRouter.
Parts and Tool List
The following is a list of the parts and tools used as best I can remember. When it was something purchased, I have included a link. Items I already had won’t be.
Networking Hardware
- Ubiquiti EdgeRouter X
- Ubiquiti UniFi AC AP LR
- Ubiquiti NanoStation M2
- TP-Link router
- weBoost 4G-X RV
- Yagi antenna
- DC PoE injector (2x)
- All Satellite Internet Equipment
Electrical/Cabling
- RJ-45 bulkhead
- RJ-45 Bulkhead Connector
- 50 ohm RG-316 cable
- RV Outlet
- Triple Switch
- Power Strip with individual switches
- Right Angle Replacement Plug
- 5V USB to OBD II Adapter
- Coaxial Bulkhead
- SMA Bulkhead
- 3 GHz F-connector
- 12V Terminals
- Heatshrinks
- Weather-sealed F-connectors
- USB Port
- USB Port Faceplate
- 14×2 wire (with ground)
- 12 AWG red/black wire
- Ubiquiti ToughCable Cat5e
- Quad-shield RG-6
- 4-way push in wire nuts
- Electrical tape
Miscellaneous
- Hole Grommets
- 1U Rack Mount
- Rubber Clamp
- Dual Suction Cup Mount
- Single Suction Cup Mount
- Stainless Steel Screws
- Telescopic pole
Tools
- Heat Gun
- 12V Terminal Crimper
- Borescope
- Hole Bits
- Electrical Fishtape
- Wirecutters
- Cordless Drill
- Screwdrivers
- Utility Knife
- Drill Bits
- RJ-45 Crimper
- Dremel
- Multimeter
- Tape Measure
- Level
- F-connector Compression Crimper
- Flashlight
- Vacuum