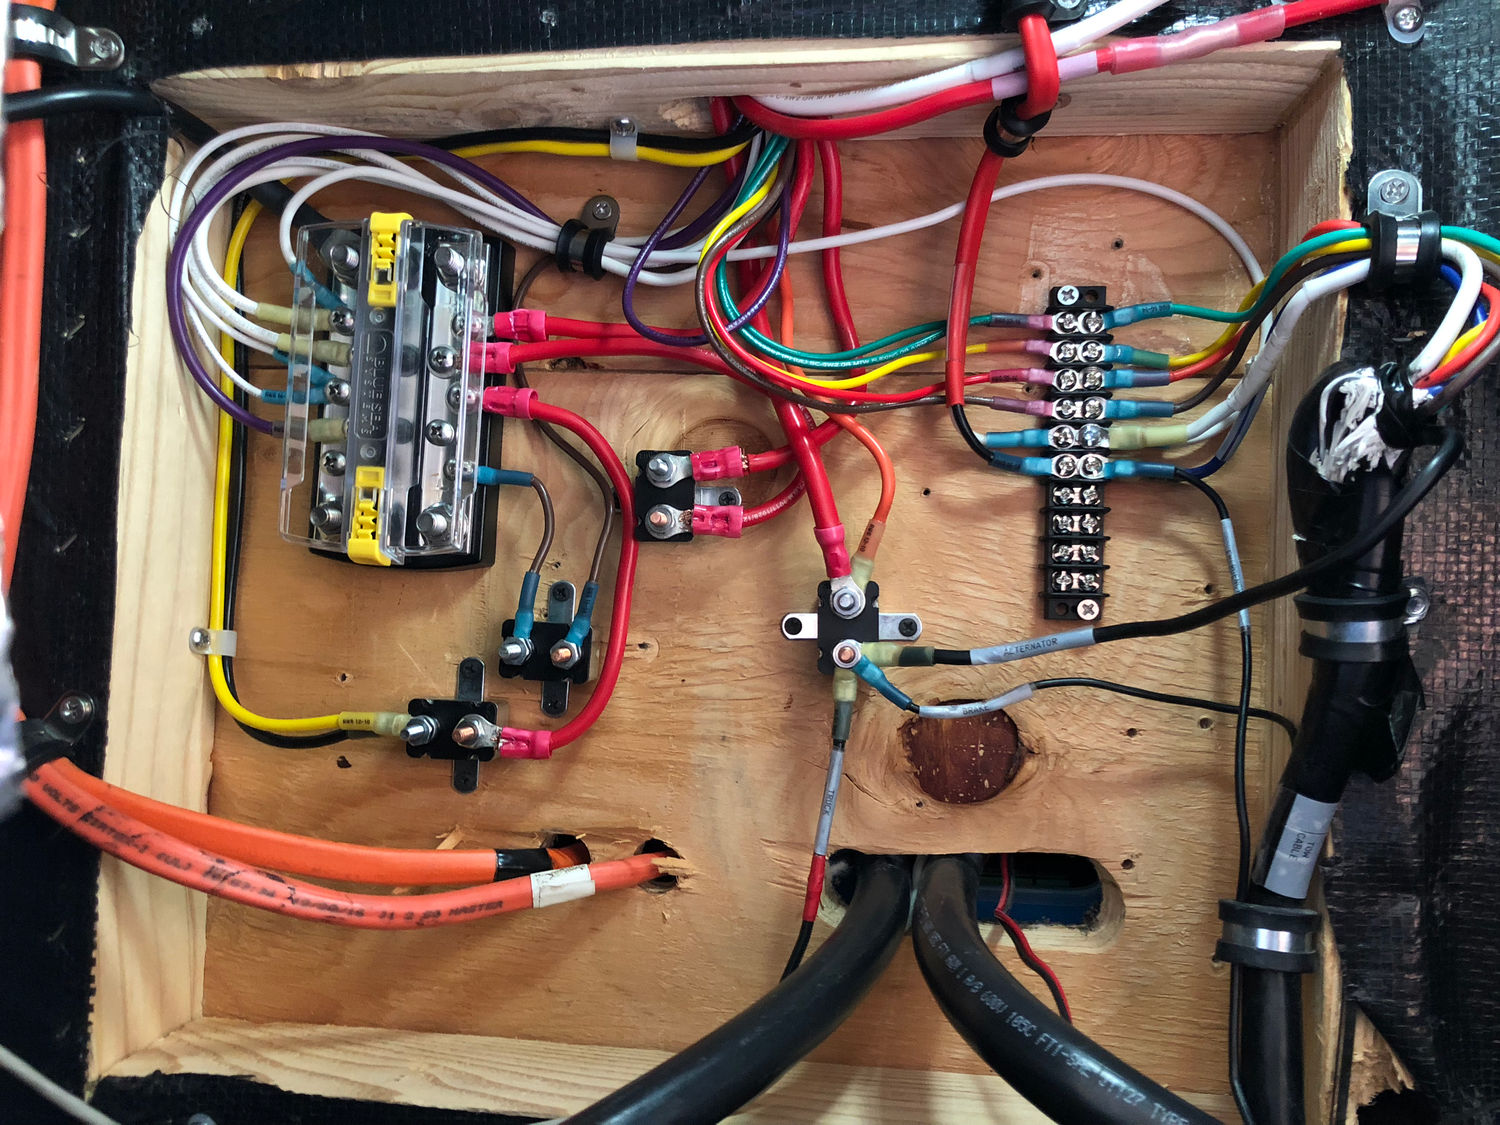
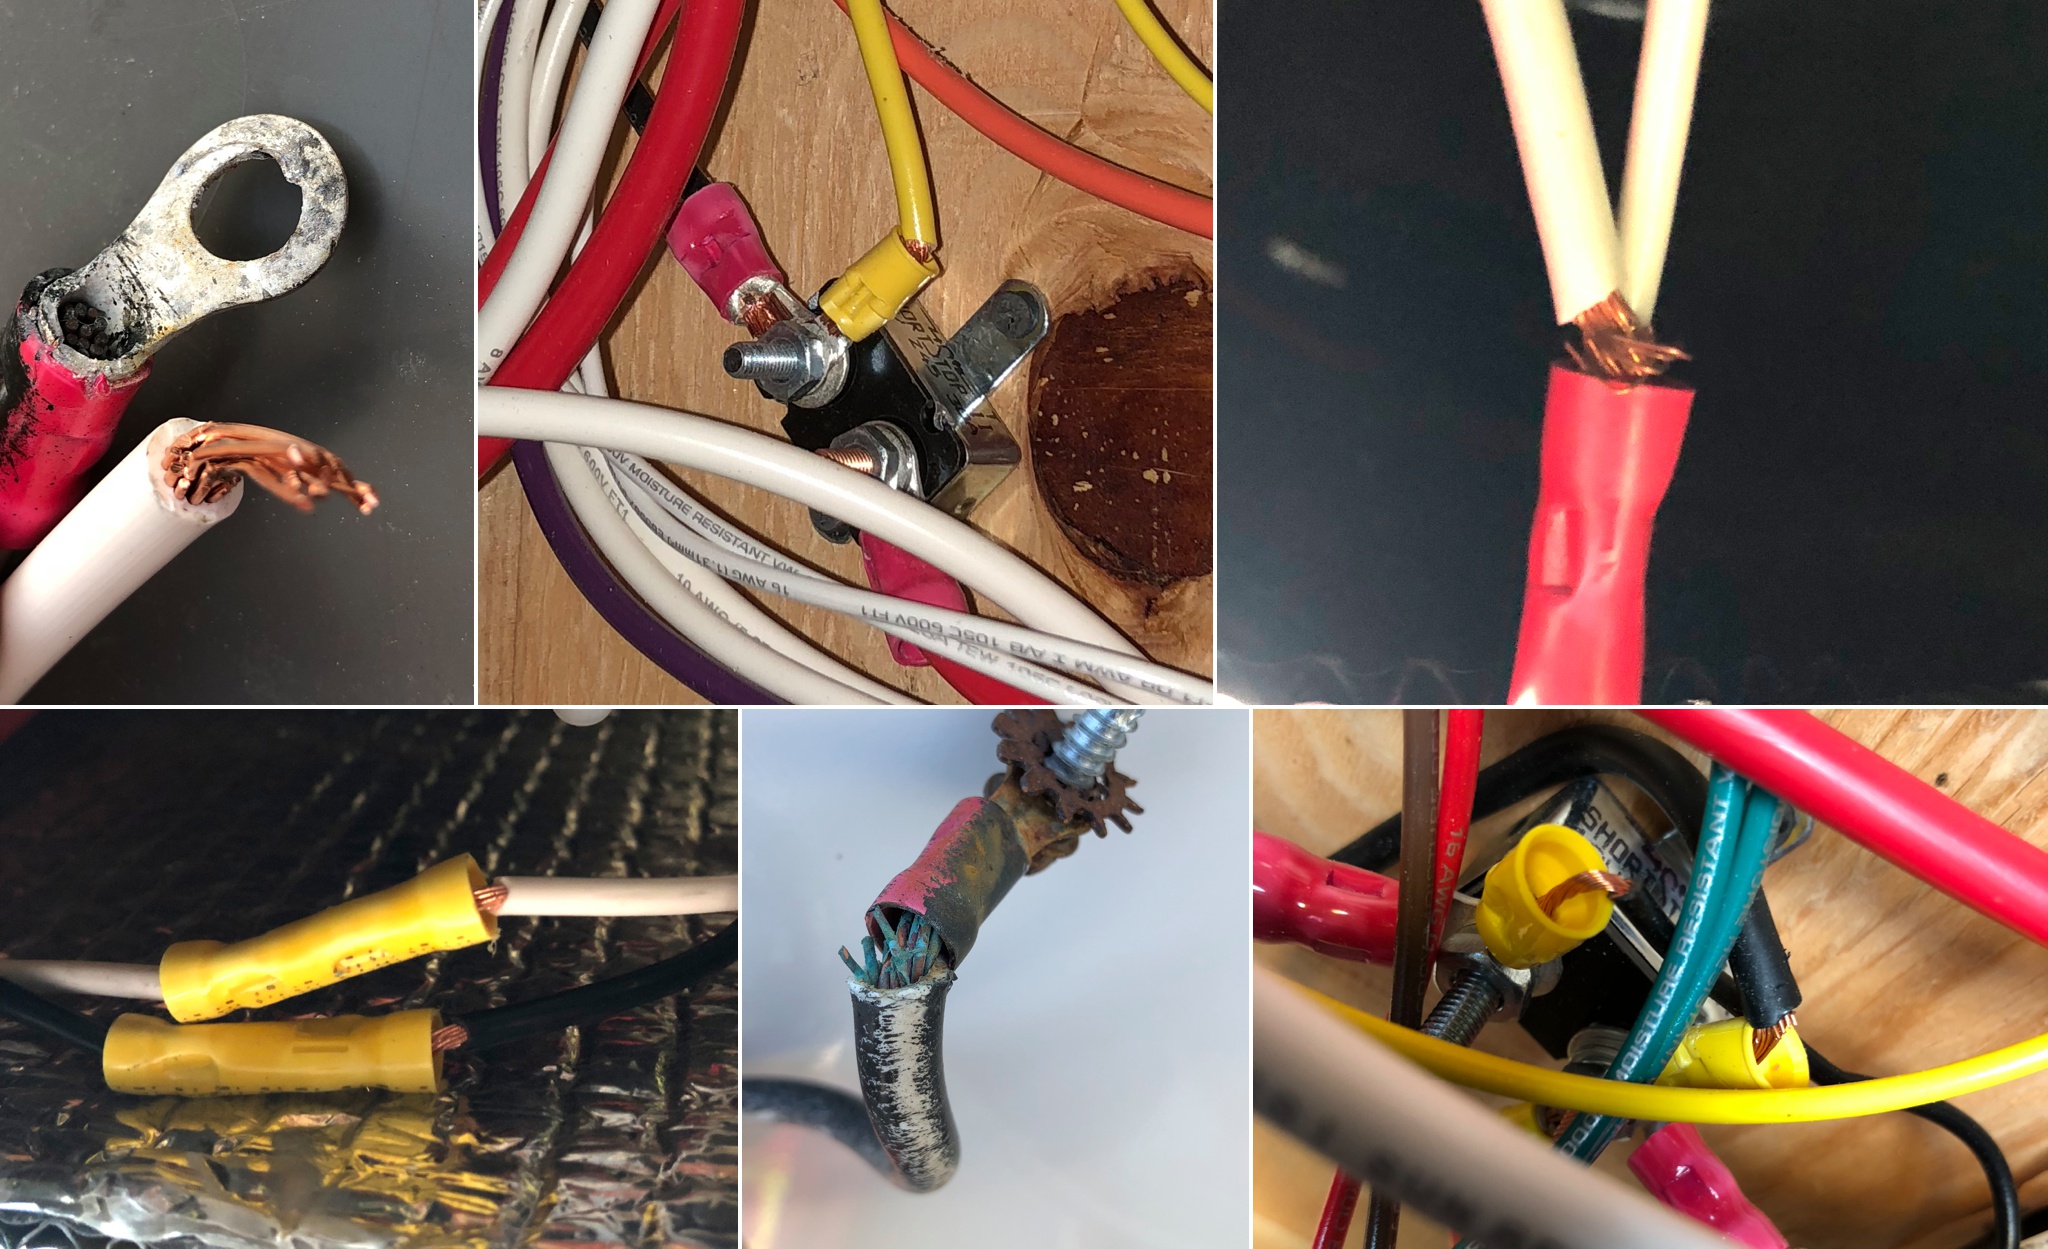
If there’s one weakness on Outdoors RV trailers, it’s the electrical system. While digging through the trailer’s wiring to do my battery upgrade, inverter installation, and solar panel mounting, one common issue I kept encountering were poor crimps. Some were so bad they even pulled out of the connector when lightly pulled on.
The wiring is concentrated in two spots: at the fuse panel below the bedroom coat closet and behind an access port in the bottom coroplast near the tongue. Both are a complete mess, but I set out to clean up at least one: the briar patch at the front.
During the course of the inverter installation I redid some of the worst crimps for safety and reliability reasons, but I largely left the web of wires alone. I planned on coming back to it and didn’t want to make any changes that were too permanent until it was in a state where I could consider it done forever. After adding the solar panels, that time came — additional solar panels from this point won’t affect any of that.
Before
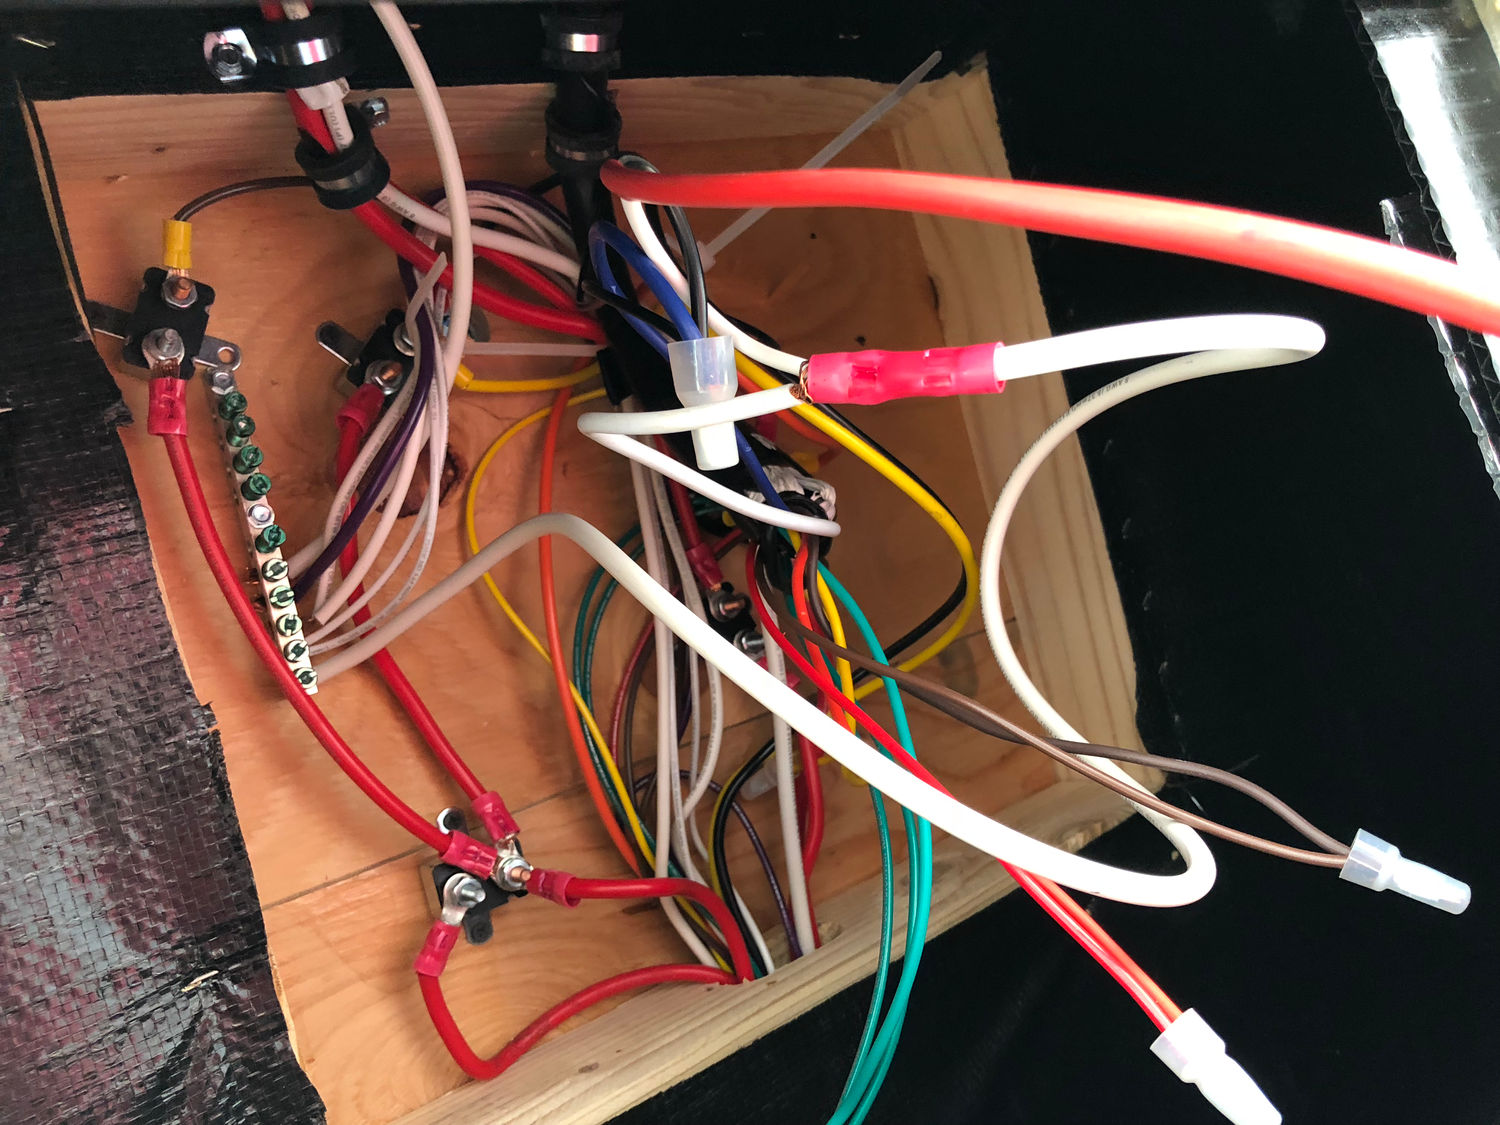
This is the original mess before touching anything. Mixed in that tangled mess is a shared negative bus bar, several auto-resetting breakers ranging from 15-45A, and a few splices. They’re basically placed where the wire length dictated rather than showing any attempt at organization.
Inverter Installation
Because I was mounting the inverter and related components in the pass-through storage, I needed to move a few pieces of the factory wiring to make room for the penetrations through the floor. In the process of doing this, one side of the emergency brake wiring fell out of its crimp. It’s not like that’s important, right?
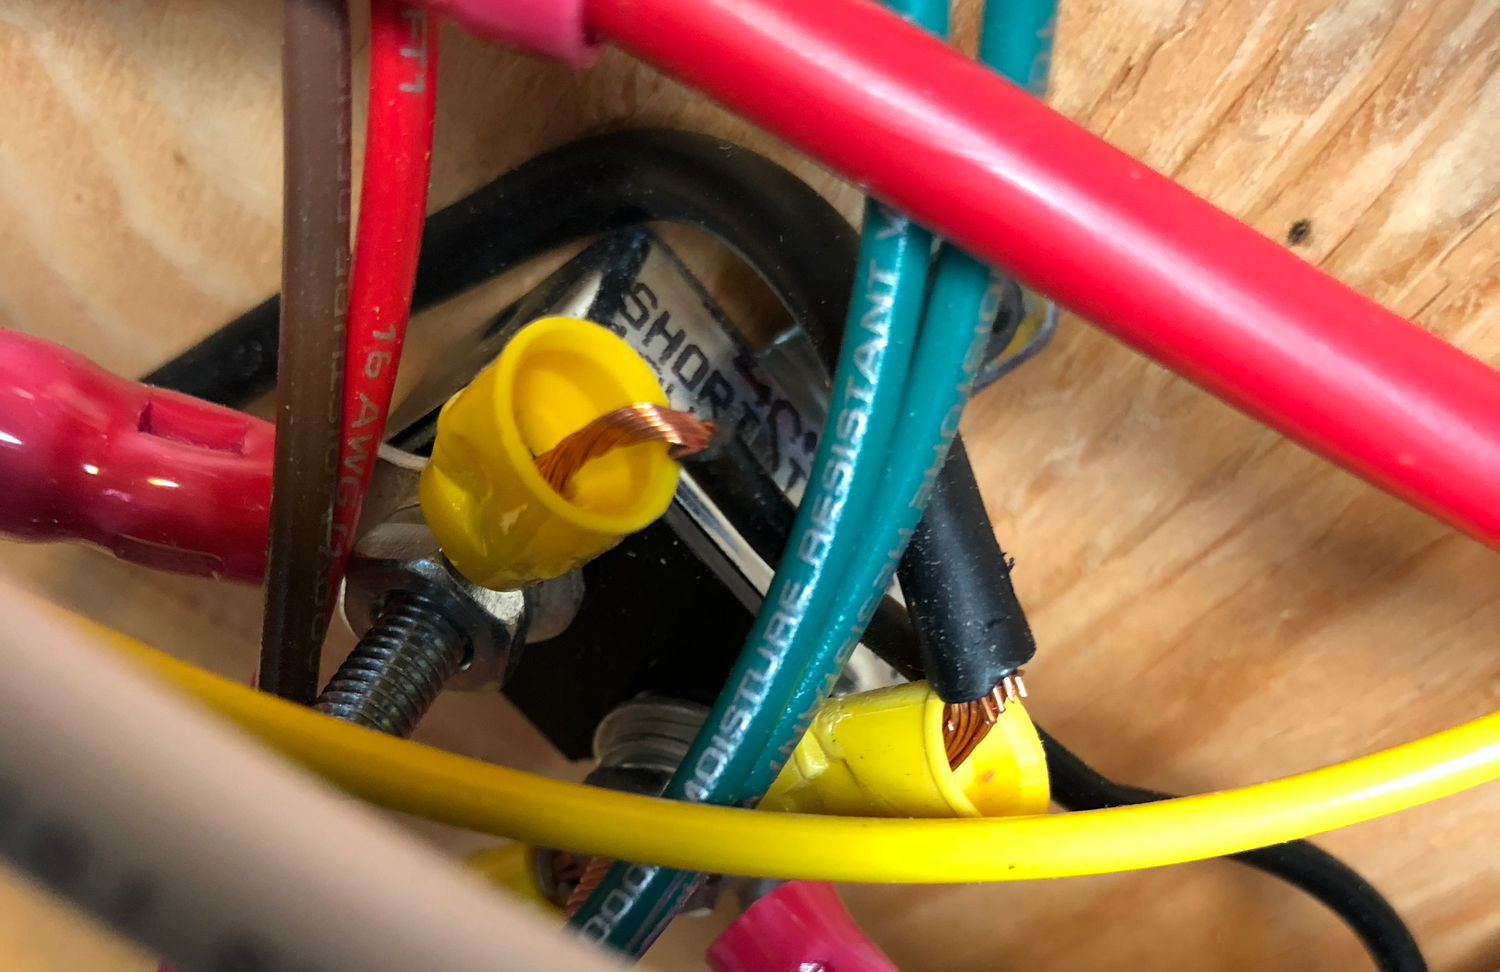
I redid the emergency brake crimp along with a few others that looked suspect. Beyond the loose crimps, whoever did the work originally had a habit of cutting into the copper to the point of breaking several strands. That lowers the overall ampacity of that connection, potentially creating a hazard if it’s operating near its limit.
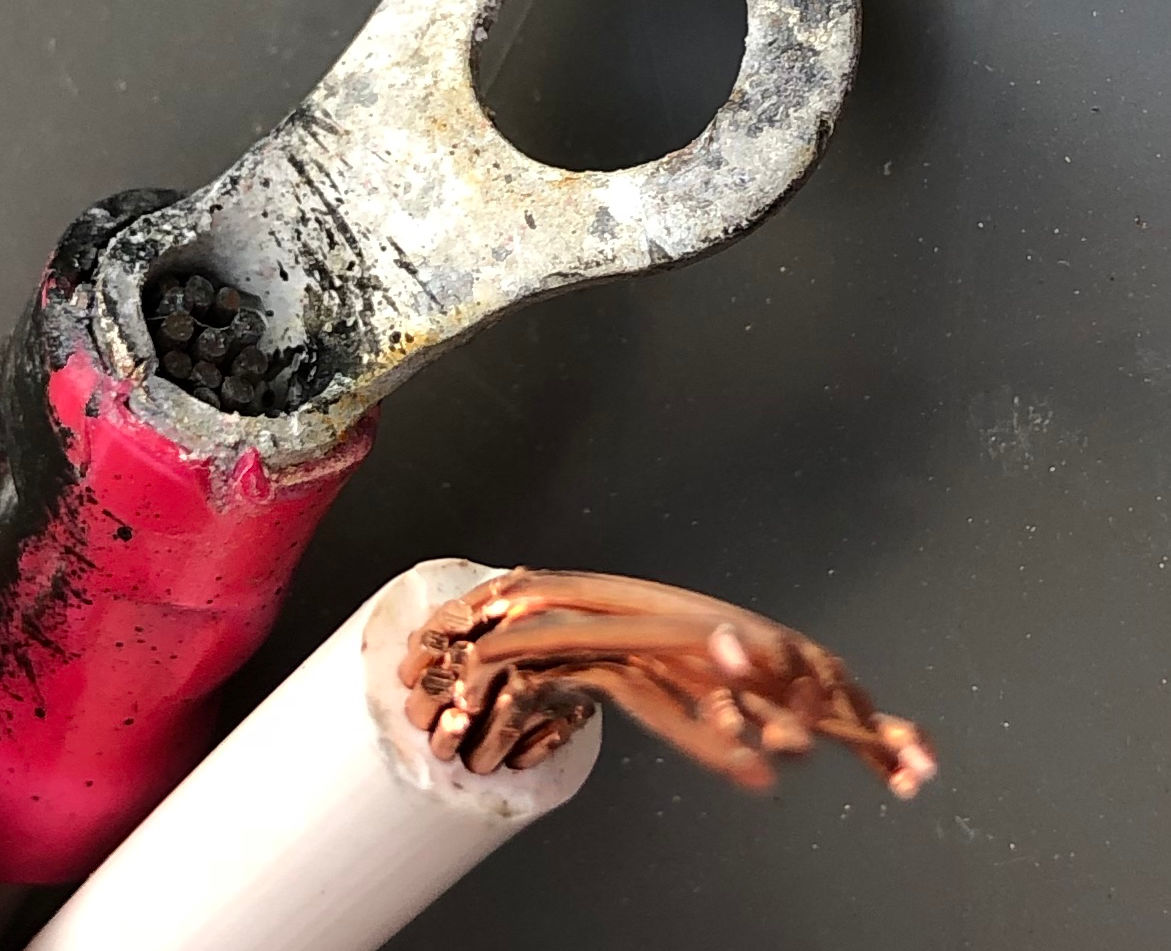
By the end of the inverter installation, I had fixed most of the crimps that were in need of replacement. The only exception were the 8 AWG ones since I hadn’t yet found a marine-grade connector with built-in heatshrink at that point.
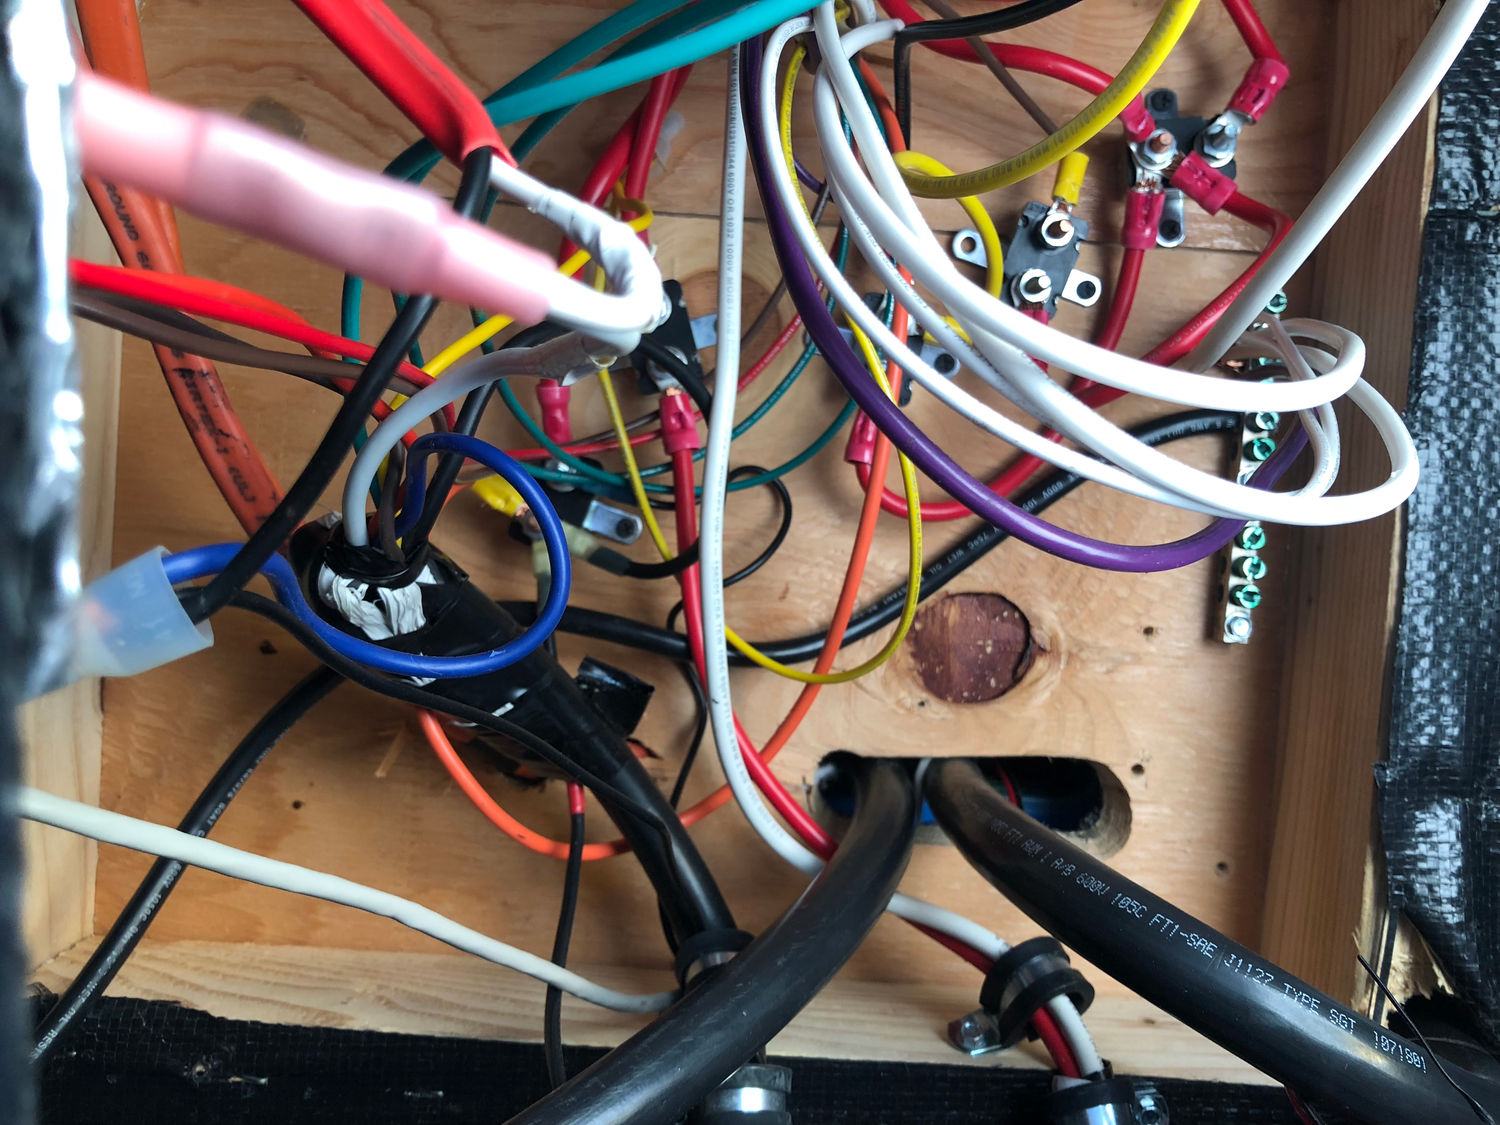
Final Cleanup
Satisfied with the inverter installation, it was time to tackle cleaning up the rest. The factory installation relied on a shared negative bar with screw terminals and a daisy-chained series of auto-resetting breakers for the positive side. I wanted to replace or improve both of these with something that would allow for a much cleaner layout.
I chose a split bus bar by Blue Sea to handle the loads terminated in that area and a terminal bar (also by Blue Sea — marine parts are so much better than other options) to help clean up the numerous splices, particularly with the tow cable harness. The crimp terminals I would be using are the variety with the built-in adhesive-lined heat shrink, which eliminates any possibility of corrosion on the wires.
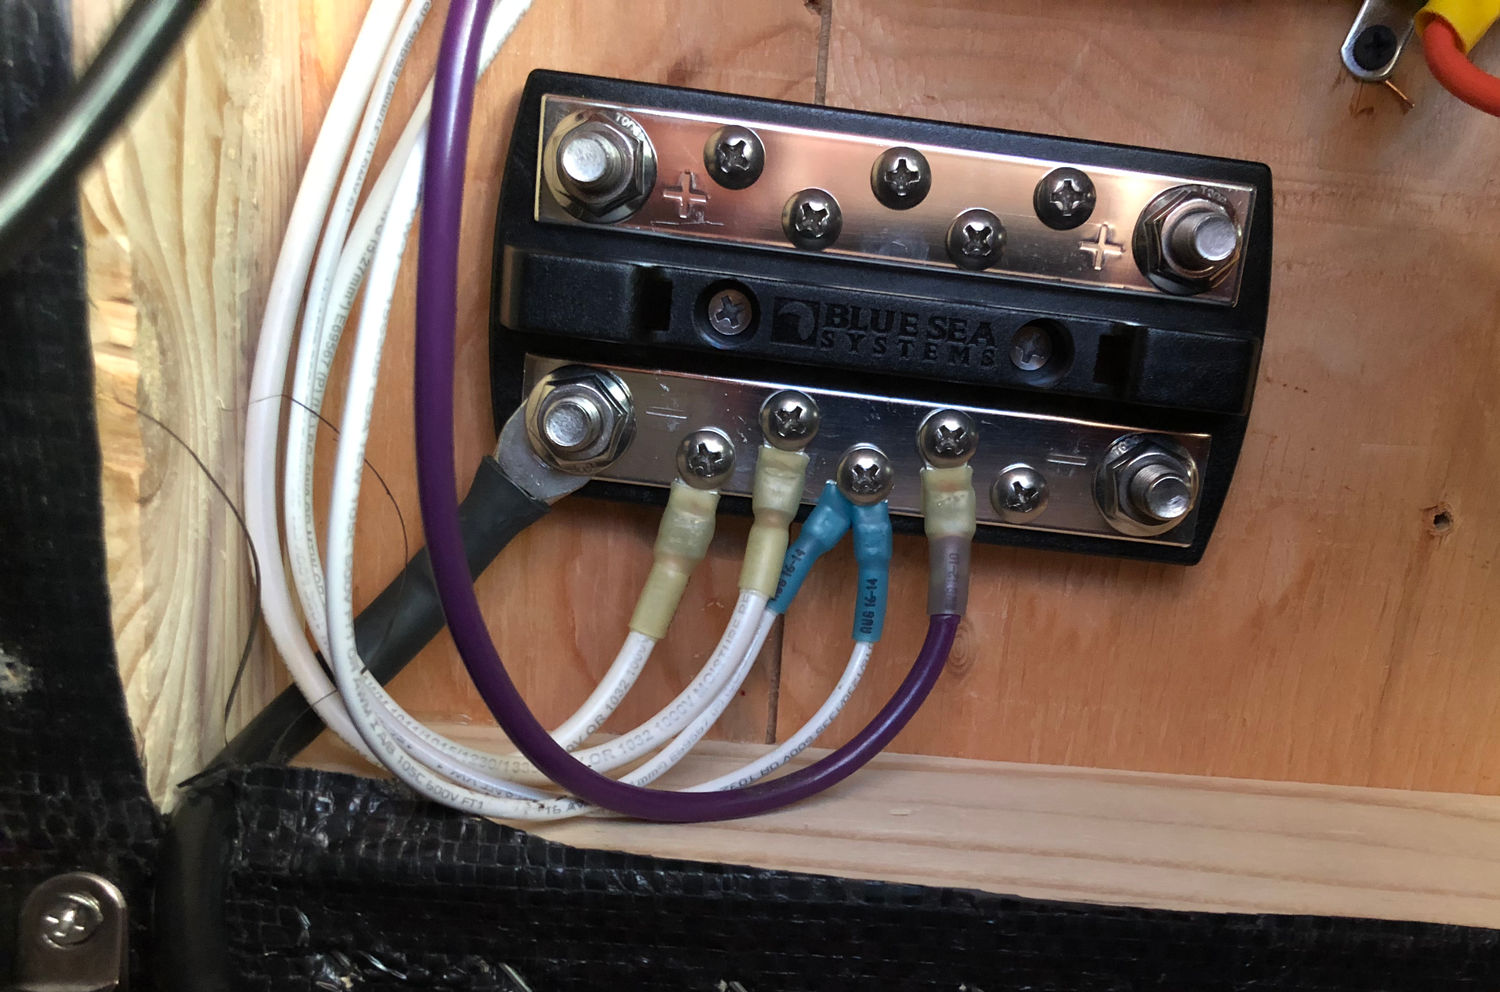
Starting on the negative side, I crimped ring terminals on the bare wire ends and attached them to the bus bar. Following that, I moved on to the positive side and replaced the crimps as needed while attaching each of the breakers to the bus bar. All of the breakers ended up being moved during this process to line up better.
The terminal bar came next, one side being dedicated to each side of the crimps. This allowed for a much more solid anchoring of the two cable harness and also ensured that everything was connected to the same wires as before. Also attached here is the repeater for the tire pressure monitoring system.
Lastly, I added anchors where needed to hold the wires in place. Movement as the trailer is traveling is one of the worst things for crimps, so reducing that as much as possible will only benefit the wiring in the long run.
