
Between heat and cold, dry air and humid air, winter road chemicals, sea salt spray, road bounce, and the various other conditions a travel trailer can find itself in, maintenance needs are a certainty. Unfortunately, the manual isn’t much help in that area — its very vague descriptions of the maintenance tasks needed seem more oriented towards sending you to the dealer than becoming self-sufficient with your RV. The following documents the major processes I’ve developed for maintaining ours, a 2017 Timber Ridge 25RDS by Outdoors RV. It includes only the tasks that I’ve done for longevity purposes rather than being primarily cosmetic (e.g., polishing the front diamond plate).
Batteries
It’s no exaggeration to say that I’ve read A LOT about the batteries used in RVs. The most common, flooded lead acid, are the most maintenance-needy with their somewhat regular requirement to be watered. Others, such as lithium and AGM, are virtually maintenance-free. Because I have a flooded lead acid battery bank and that’s where my experience is, that’s what I’ll be covering.
Flooded lead acid batteries are built of a series of lead plates submerged in a sulfuric acid bath (the electrolyte). Actual constructions will manipulate alloys and overall structure to improve capacities, lifespan, and so on, but the chemistry is pretty straightforward: the negative side of the battery will be pure, metallic lead (or whatever alloy is being used — lead-antimony is common), and it will be the oxide equivalent on the positive side, both of which will be submerged in a water/sulfuric acid electrolyte. As it discharges, the plates gradually turn into lead sulfate on both sides, and the bath becomes closer and closer to pure water. Charging reverses this reaction, returning it to its original state.
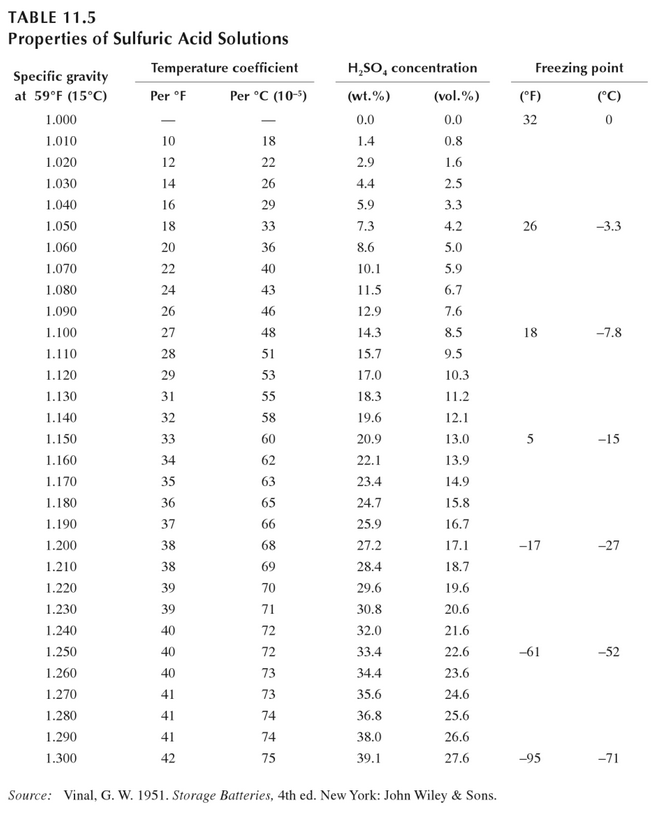
As a brief aside, this is why it’s important to keep flooded lead acid batteries as charged as possible during winter use. As the electrolyte becomes more and more water, its freezing temperature rises. At 100% SOC, the electrolyte will freeze around -80°F/-62°C or lower, around -18°F/-28°C at 60% SOC, and around 21°F/-6°C or higher if fully depleted. -80°F is pretty difficult to hit, and -18°F is rare enough, but 21°F is pretty common in any area that actually experiences winter (it’s 20°F right now).
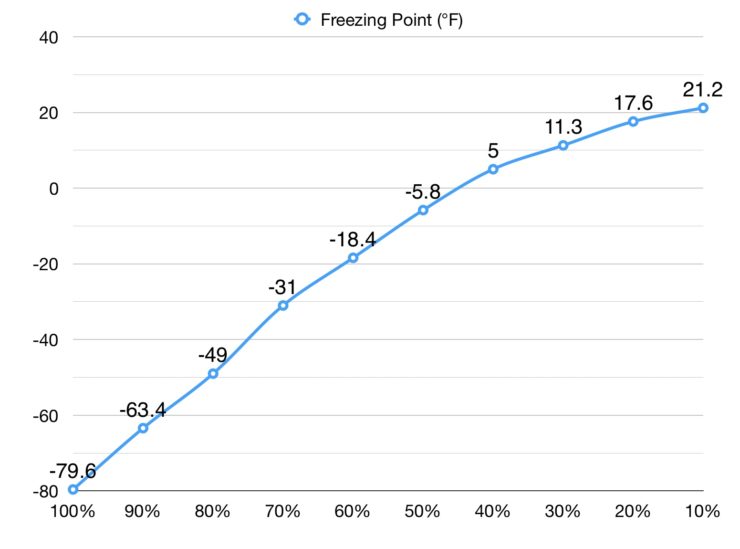
It’s also better to err on the side of caution and assuming that the battery may be slightly more discharged than you think, or you may be in for an expensive, premature replacement. The only true measure of a battery’s SOC is the specific gravity of the electrolyte (i.e., how much of the electrolyte is still sulfuric acid rather than already having reacted with the lead plates). A charge percentage on a battery monitor is just an estimate based on the current flowing through its shunt.
The maintenance needs comes from the imperfection of the chemical reaction. Some of the water is lost into the air as hydrogen and oxygen and needs to be replaced with additional distilled water. Most deep cycle batteries will have supporting literature that tells you the desired level — for my Trojan T-105s, it’s about 1/8″ below the bottom rim of the vent.
If the electrolyte level drops low enough to expose the top of the plates, rapid degradation can occur, which will unnecessarily shorten the lifespan of the battery. Inspect them periodically to get an idea of the needed replacement rate of water (mine need topping off about every 6-8 weeks) and keep them watered. There are a variety of tools to do it ranging from a specially-shaped watering can to a connected set of hoses.
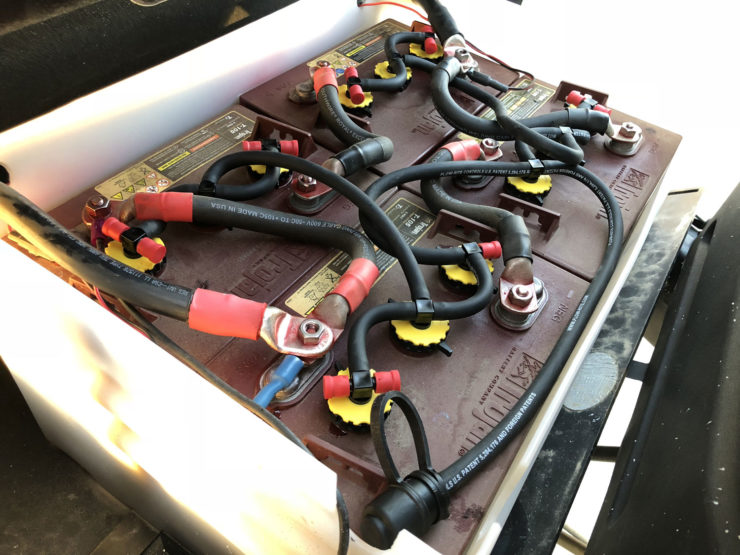
The only additional thing I do is keep the terminals coated with a protective spray. Corrosion there is rarely a significant issue, but its effects can be annoying.
Tank Sanitation
Regular tank sanitation keeps the tanks odorless, and, in the case of the freshwater plumbing, potable. In one of its few specific recommendations, the ORV manual recommends sanitizing the freshwater tank (by filling and letting sit for a few hours) annually using a solution of 1/4 cup chlorine bleach and one gallon of water per 15 gallons of tank capacity. I choose to do it quarterly, and I do all three tanks, though for obvious reasons the frequency can vary based on usage (at least one trip monthly for us).
Despite having two 40 gallon tanks and one 80, the sanitizing mixture is given at a 15 gallon volume. Adjusted for the actual tank size, that’s 2/3 cup of chlorine bleach per 40 gallons of tank capacity. The actual procedure is simple:
- Mix the appropriate quantity of chlorine bleach with at least three gallons of water for the black/gray tanks and double that for the freshwater tank. The purpose of the water at this stage is just to dilute the bleach as it’s poured in, not to fill the tank.
- Pour the bleach-water mixture into the tanks.
- Freshwater: Into the outside inlet.
- Gray: Into the shower drain.
- Black: Into the toilet.
- Fill the remaining tank capacity with tap water. For the freshwater system, run each fixture until the water coming out smells of bleach.
- Let soak for several hours.
- Drain, flushing out and rinsing out if desired (I typically only flush out the freshwater system).
Rust Prevention
Almost every piece of metal from the floor down is steel, and much of it is exposed. Despite its factory coat of black paint, it didn’t take long for rust to find our frame. After a coastal trip and a winter of road spray, there was rust all over the underside of the trailer. It was on the axles, leaf springs, hubs, propane line, frame, rear bumper, tongue, battery tray, and propane tray — everywhere.
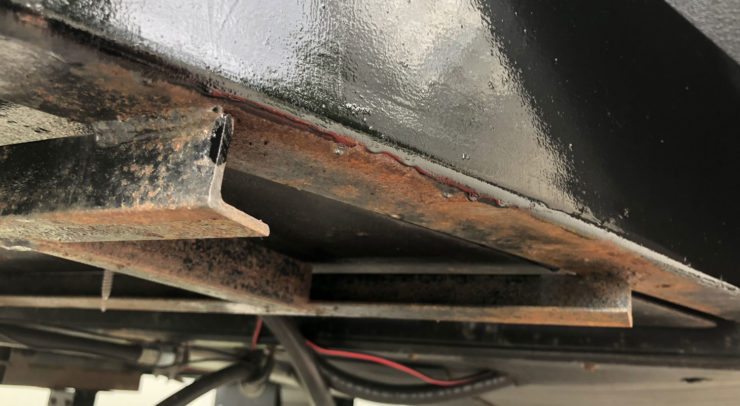
Maintaining this means two things: neutralizing the rust and adding a protective paint layer. There are a variety of products available for this purpose, the most recent of which I’ve used is POR-15, which is a paint-on coating. I may try a spray next time for ease of application — the paint-on coating took multiple days and six foam brushes (bristled ones didn’t work as well).
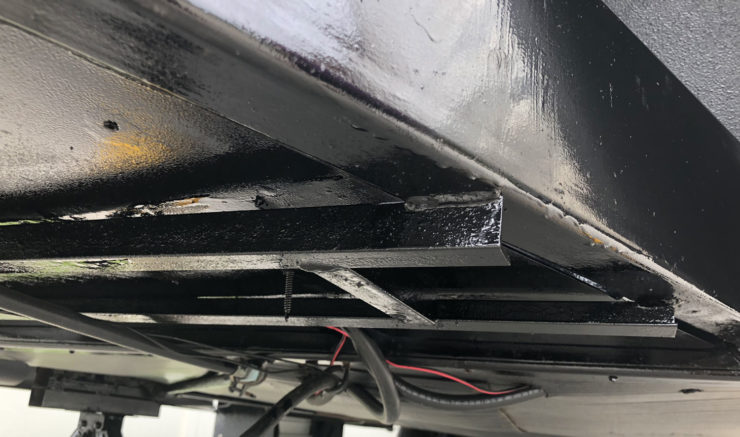
The frequency of this depends on where and when you go. Traveling into the mountains during the summer is much easier on the metal than doing the same during the winter. It’s definitely worth keeping up on so you’re not stuck doing the entire frame at once like I did, though.
Winterizing
When not actively being heated in sub-freezing temperatures, the plumbing needs to either have all water removed or replaced with RV antifreeze (pink). If not done, it will freeze and expand, potentially bursting the water lines or fittings.
There are two popular methods for winterizing an RV:
- Blow out everything with compressed air.
- Use the factory-provided intake tube and bypass to pump RV antifreeze into all of the plumbing.
I use method #1. The major reason for that choice is that we use the trailer periodically over the winter, and it is much quicker and cheaper to do it this way (though not as foolproof). A secondary reason is that it’s lower effort, and I don’t have to be concerned with trying to get all of the antifreeze out of the freshwater lines when wanting to use it again.
My process for doing this takes less than 30 minutes:
(drain all tanks if not already empty)
- Bleed off the pressure on the hot line by turning on the faucet inside. This is important — if you do not do this, you will get a shower in step 2 (ask me how I know).
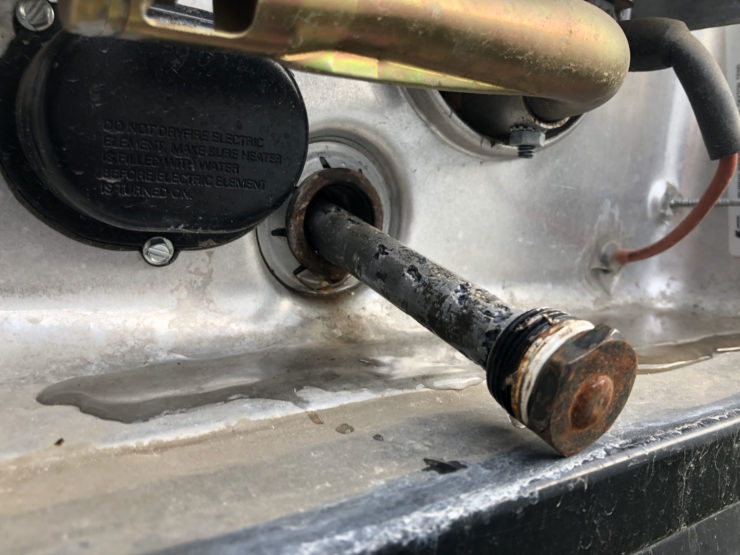
- Remove the anode on the hot water tank, allowing it to drain. It’s unlikely you can get all of the water out, but the amount drained just by removing the anode allows any left room to expand safely if it freezes.
-
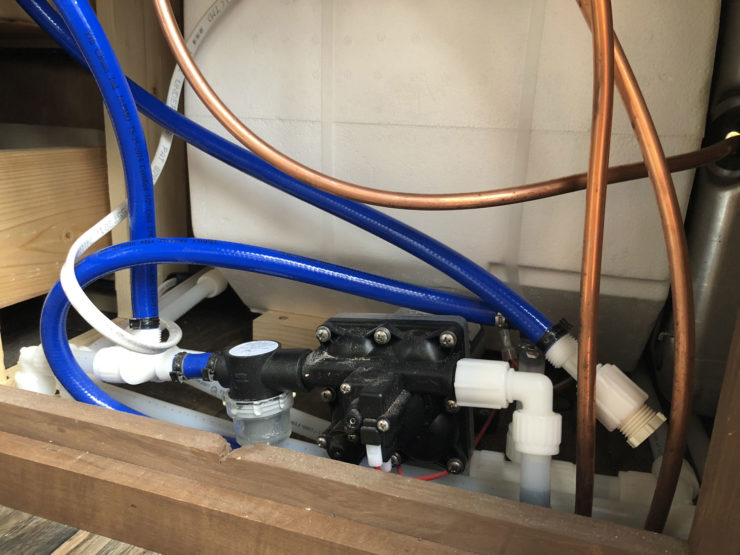
Remove inside access panel to water pump and hot water tank. On ours this is just inside the rear door.
-
Turn on hot water tank bypass.
-
Replace anode on hot water tank.
- Adjust air compressor to 50 psi. The onboard water pump pressurizes the lines at 55 psi, so this puts it in that ballpark, ensuring it won’t damage anything.
-
Attach the air compressor to the trailer’s city water connection using an air hose to water hose adapter.

-
Open faucets one at a time, both cold and hot sides, until only air comes out. This includes the kitchen, bathroom, inside shower, and outside shower.
- Hold the toilet flush pedal until water stops coming out.
-
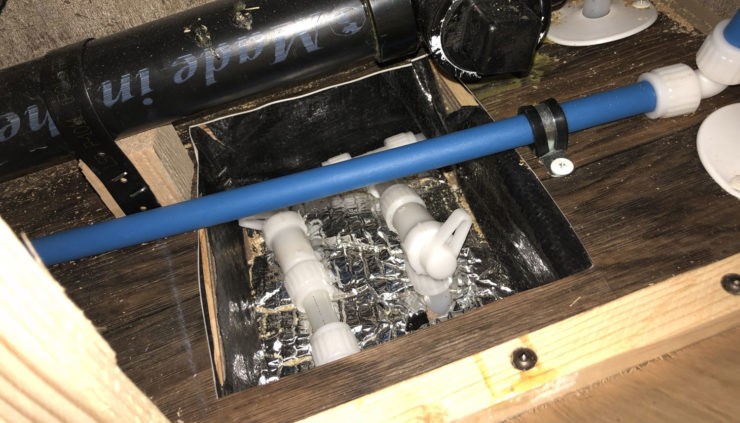
Open the access panel for the low point drain (below the bathroom sink on ours) and open both low point drain valves. This will allow the majority of the remaining water to leave the system.
-
Remove the compressor hose from the city water connection once only air comes out of the low point drains. Bring around to the other side.
- Switch the valve at the pump to the antifreeze intake and use the air hose to blow out the pump.
- Close the low point drain valves.
- Pour enough RV antifreeze into each P-trap (kitchen sink, bathroom sink, and shower) to displace the water. Add some to the toilet bowl as well to keep the seal wet.
The PEX used on our trailer is clear in most places, so I’m able to visually see whether or not any water is still in the lines. A little bit won’t be a problem because it has room to expand, but a lot doesn’t have that room, so it may be necessary to hook up to the city water connection one last time before closing off the low point drains. Either way, it’s important to read the system and decide if it needs more of anything.
Dewinterizing is even quicker:
- Turn each bypass back to the normal direction. Replace access point covers.
- Attach city water or fill water tank and turn on pump.
- Open each faucet until water comes out and press the toilet flush pedal until water comes out.
- Disconnect or turn off the pump once the system is pressurized.
Roof Inspection and Touchups
RV roofs are made of a variety of materials, one of the most common being EPDM. It’s a thin rubber membrane stretched across a layer of wood (in our case, plywood) and attached at the edges. As far as maintenance goes, it’s far from needy, typically just needing a periodic inspection and, in our case, the occasional touch up to repair damage from tree branches (our trailer is tall and some access roads aren’t trimmed very high).
UV Protection
To maximize the lifespan of the roof, I do a periodic cleaning and application of a UV protectant. I use the Dicor line of products, and like many temporary products, the manufacturer suggests applying once per month. I do it more on a semi-annual basis.
- Clean the roof. I do a rough pass with the hose to spray off everything loose before using the Dicor roof cleaner and car wash brush.
- Apply the UV protectant.
Sealant Upkeep and Repairs
Penetrations and edges on the EPDM are sealed with Dicor lap sealant, both from the factory and later additions. While fairly durable, this can develop gaps over time as it flexes and experiences the elements. For that reason, it needs periodic re-sealing in spots, which are most easily found by visual inspection — you can’t have too much, so it’s best to err on the side of caution.
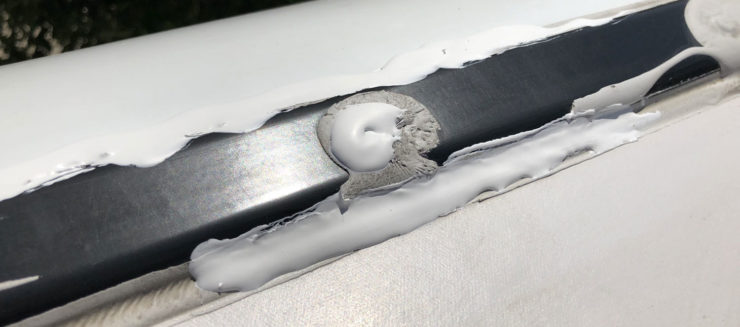
New lap sealant adheres fairly well to clean existing lap sealant. This means cleaning first by washing away anything loose as if you were doing a regular clean of the roof but adding the final step of scrubbing with denatured alcohol (lap sealant and EPDM both stain, so it may not look clean). Allow it to dry fully before applying new lap sealant, and you may also choose to remove old lap sealant first.
I find one or two annual checks to be sufficient for this, but I also check when cleaning the solar panels since I’m up there anyway.
Fiberglass Upkeep
Like the roof, the fiberglass walls can also greatly benefit from regular UV protection and “waxing”. I don’t actually use wax for this, but the basic result and application process is more or less the same. Instead, I use a product called Rejex that I discovered via RV forums, which achieves similar results to wax but is actually a polymer sealant that is easier to apply and lasts longer in my experience.

The basic process is simple:
- Wash the RV, allowing it to fully dry.
- Apply the Rejex by rubbing it onto the fiberglass (I also do the decals but avoid anything rubber, such as the slide seals). For our size of trailer, it takes about half of a bottle each time.
- Use clean microfiber towels to wipe off the visible residue after waiting at least the amount of time mentioned in the bottle instructions (10-20 minutes). Usually this just means circling the trailer twice as the first area done has waited long enough by that point.
- Allow it a day to cure before it gets wet again (i.e., don’t do it too soon before rain) or towing it anywhere.
The fiberglass also has a number of penetrations including all of the windows, the storage doors, the exterior speakers, and so on. Each of these is sealed first by mounting onto a butyl tape layer and then by caulking with ProFlex RV (a non-silicone sealant). I don’t ever anticipate needing to do anything with the butyl tape, but the ProFlex needs redone periodically (for obvious reasons, this should not be done immediately after waxing since it won’t stick as well). Application is labor-intensive but fairly straightforward:
- Remove all existing caulking. A utility knife and glass scraper tend to work the best for this, but it’s important not to damage the fiberglass.
- Trim away any butyl tape that has squished out (it looks like gray putty).
- Prepare the surface where the caulking will be applied. I like Xylol, but it’s very important it fully dries or the ProFlex will not adhere.
- Apply a thin bead, smoothing as needed with a finger wetted either by soapy water or Xylol.
Solar Panel Cleaning
Solar panels work best when they’re clean. During the summer in our area, it’s common to go weeks without precipitation of any kind. This allows high amounts of dust and forest fire smoke to fill the air, which means the next rain is really, really dirty.
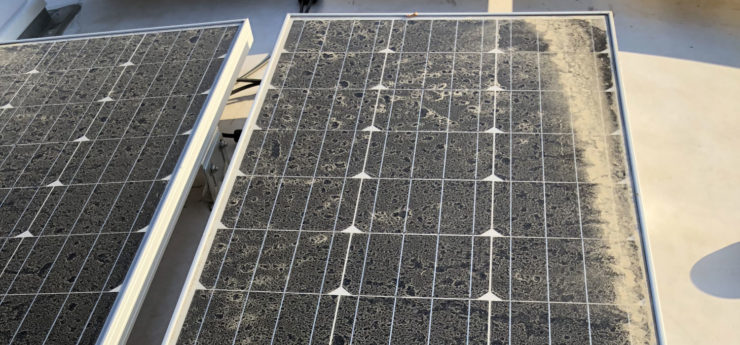
I do a periodic visual inspection to see if the solar panels need cleaning, and if they do, I clean them just like a window:
- Hose off if really dirty, otherwise start with step 2.
- Spray glass cleaner and wipe off with paper towels or a rag.
- Wipe off again with dry paper towels or a rag to remove the streaks.
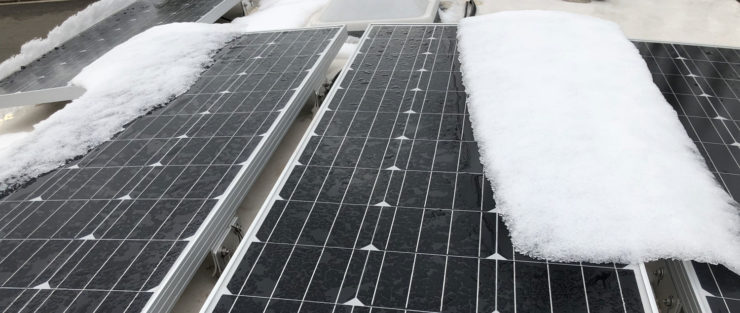
After atmospheric dust, the next most common cause of cleaning I’ve had is salt spray when near the ocean. It leaves a white, fairly opaque film on the panels that hinders output. There’s also snow, though with the low angle of the sun that time of year, you don’t have much to lose anyway.
Lubrication
There are a wide variety of spots on an RV that need periodic lubrication, but since my experience is with travel trailers, I’m only going to cover what they have.
Slide Seals
Slides have rubber seals that provide the majority of the waterproofing for the slide, both when pulled in and when extended.
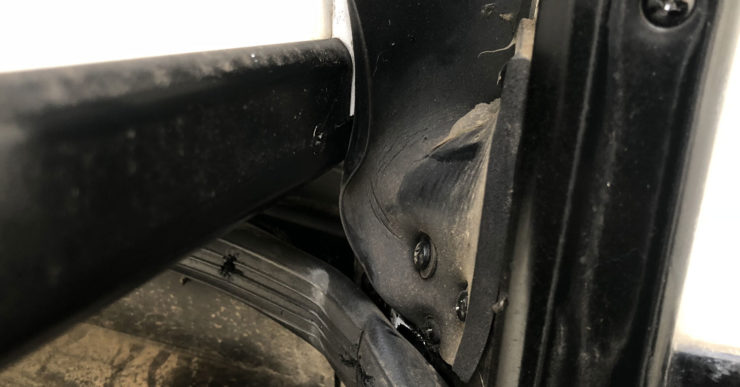
Because these seals flex so much, they really benefit from treatment by a spray specifically intended for them, which will protect the rubber and not rub off on the fiberglass it touches. I use “Thetford Premium RV Slide Out Rubber Seal Conditioner and Protectant” and apply it a couple times per year, first wiping off the seal with a damp cloth to remove dust from travel.
Slide Rails
There are many types of slides, and we only have one, so this is for that type.
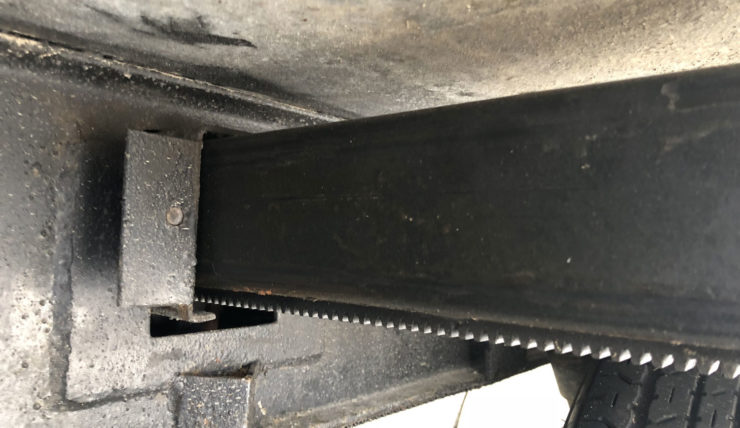
These slide rails work best when they have a coat of a dry lube (I use Protect All 40003), which both lubricates and provides corrosion protection. I chose this product because it dries, a veritable desirable trait given the amount of water, sand, dirt, and other debris that can come in contact with the rails both while moving and parked. Reapplication is as needed, usually determined when I’m checking the tires.
Wet Bolts
The suspension uses wet bolts (i.e., they have a zerk for grease). These have a much longer lifespan than regular volts because of the grease, but like the suspension on the truck towing, they periodically need new grease.
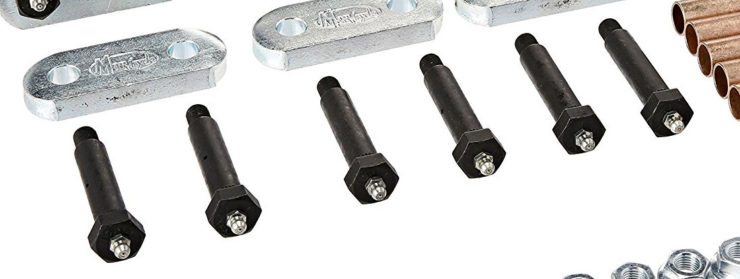
Adding new grease should be as simple as attaching a grease gun to the zerk and squeezing the trigger, but one common issue with these bolts is the trailer weight sitting on them in a way that plugs the holes. Jacking it up to reduce the weight can usually fix that. From the instructions:
At this point use NLGI Standard No 2 automotive grease to lubricate each fitting. Grease should flow easily through the zerk fitting, bolt cavity, and exit into spring eye bushing area. If grease flow is restricted, repeat the above Steps for the necessary bolt location and check the grease exit hole position of the bolt. The hole position may need to be altered to better allow grease flow.
Hitch
I keep the hitch ball greased as well to minimize wear and inhibit rust. With as heavy as the tongue is, it will quickly wear into the ball without some lubrication. On average I find I need to add grease every 3-4 trips, though it can vary depending on how dirty the location is.
This isn’t necessarily every maintenance routine required for the trailer, but it covers the ones I’ve done. I plan to expand this as new ones arise (e.g., at some point I will need to service the axle bearings).