Aside from the whole-room ceiling lights, the one and only light installed in the bedroom of the trailer is a LED dome fixture directly above the head of the bed. Its rocker switch allows for one side or both sides to be on, but it is very, very bright. We never use it.
I wanted something more useful and less intrusive, primarily for use around bedtime or in the early morning. Isolating each nightstand was the goal so that either of us could use our light without blinding the other, and a warmer color temperature of 3000K avoided the harshness of the typically bluer light from most LEDs.
Materials
These were the materials used. Where the product is unique to a manufacturer, I’ve listed their name first. For more generic products, I listed the maker of what I used at the end.
- JR Products “SINGLE ROCKER SWITCH ASSEMBLY W/BEZEL, BLACK” – Part 12225
- 16 AWG tinned, stranded copper wire (Ancor)
- Crimp on, adhesive-lined heat shrink blade connectors (Wirefy)
- Crimp on, adhesive-lined heat shrink butt connectors (Wirefy)
- Wago 221 lever wire nuts
- Fuse assembly (Blue Sea)
- 3000K, 12V LED light strip/ribbon (Novostella)
Planning the Route
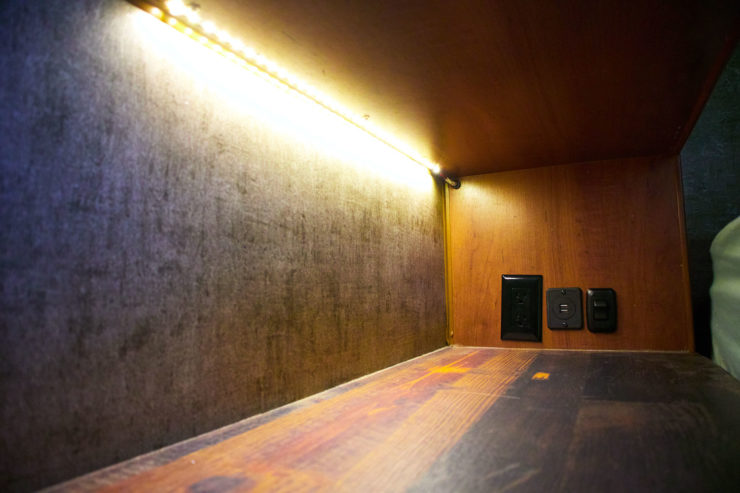
The light switch would go next to the existing USB charging outlet with the light popping out in the upper left corner of the same surface. Like other in-wall wiring projects, out came the borescope to take a look.

The vertical wood surface is framed in on the edges, the top of which meets the curved front wall and the bottom to the nightstand surface, which separates the passthrough storage and bedroom. Aside from the wiring to the 120V and USB outlets, there’s nothing in the way.
Making Holes
Confident I wouldn’t damage anything, I marked the outline for the switch and cut it out with my Dremel. A Dremel is terrible for cutting wood, but it works good enough on the thin luan of a trailer where a jigsaw won’t fit and a reciprocating saw would just splinter everything.
For the lighting, I drilled a hole equal in size to one of my rubber grommets as close to the corner as I could.

Pre-Assembly
When wiring anything, I try to do as much assembly outside the final installation location as possible. It’s often much easier than trying to cram a heat gun in some small space to finalize a heat shrink.
For this project, I spliced on a longer wire pair to the pigtail coming off the LED strip, spacing out the two butt connectors to keep it narrow enough to fit through the hole. Side-by-side would require a larger hole solely for those. I also crimped and heatshrunk one blade connector on the fuse for attachment to the switch, which left only a single crimp and heatshrink to do in place.
Pulling Wire
Because of the narrowness of the space where the top hole was drilled, I needed to run a stiffer guide wire down for use in pulling the flexible stranded wire pair. I’ve found that a piece of solid core 12 AWG is often the perfect balance of flexibility and stiffness, and in this case I also fabricated a small hook to help pull it around a sharp bend with the borescope as a guide.

Using the larger 120V outlet opening, I first pulled it to there, then shifted it over to the USB outlet opening and finally the new switch’s opening.

Connecting
The existing crimp connectors on the USB outlet got cut off, replaced with some Wago lever wire nuts, and the new wiring was connected in. Ground went straight to the ground nut while positive went to the switch and the other half of the fuse assembly into the positive nut.
At this point I added the final blade connector and was ready to mount the switch.

Mounting
After a quick test with the switch to ensure everything worked as expected, I peeled the back off the LED strip and adhered it to the cabinet’s bottom surface. Since the kit also included some screw-in braces, I used a few of those to help better support the strip and forestall the eventual failure of the adhesive.
